 |
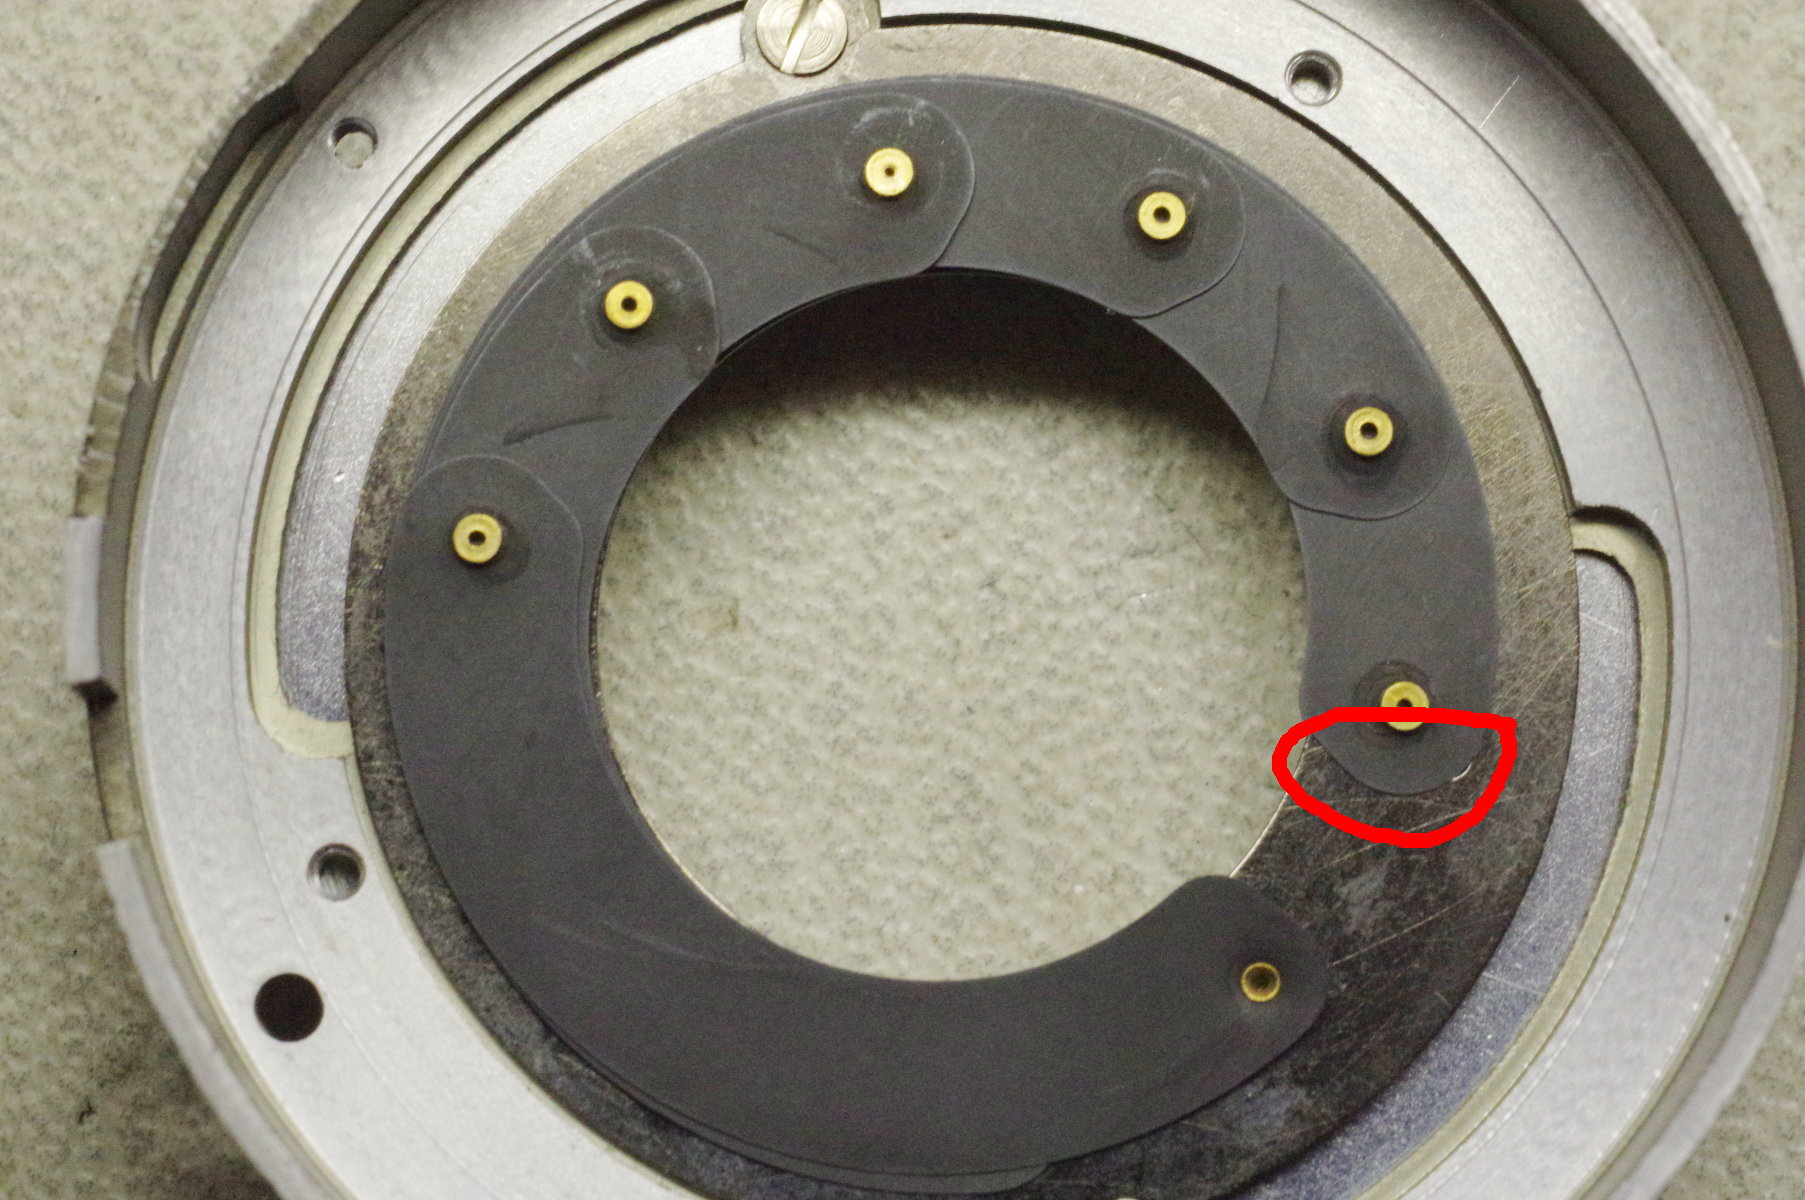
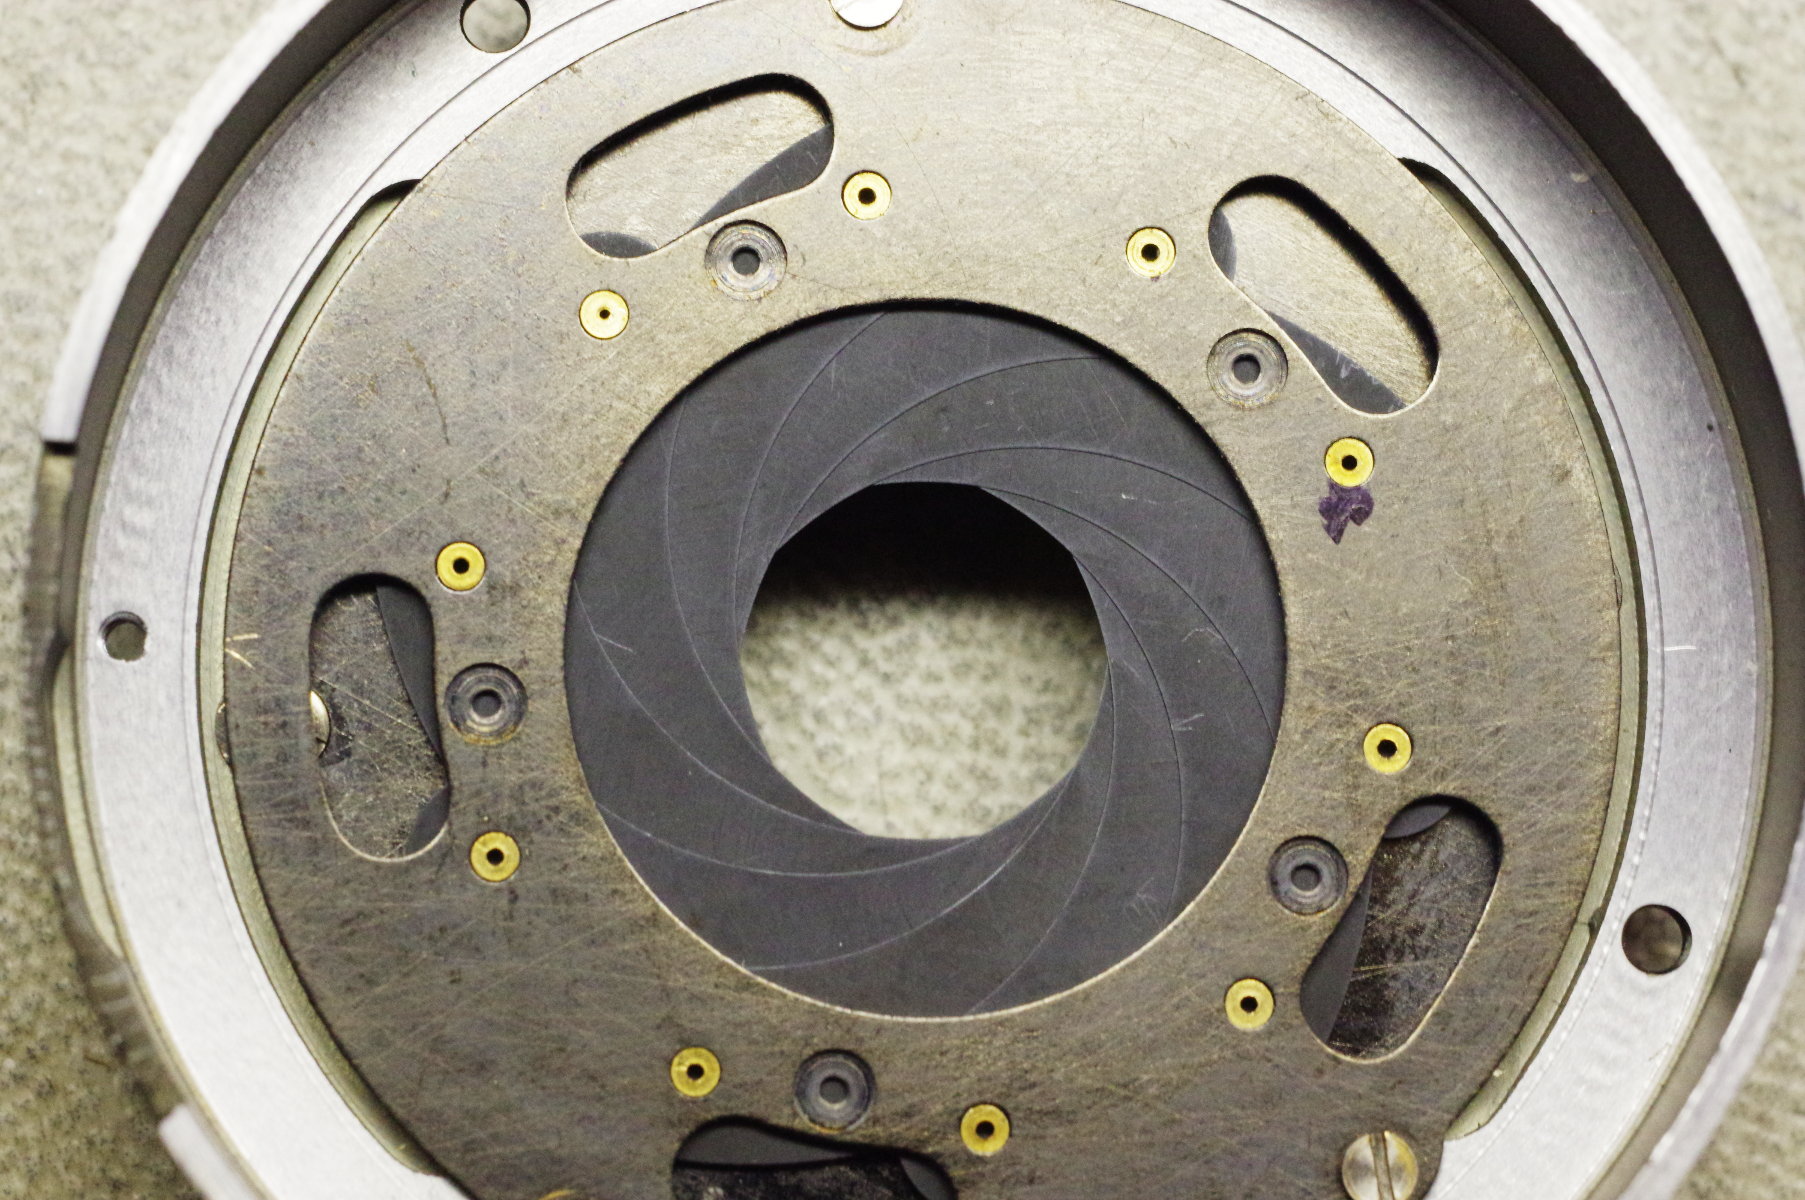
Here’s the problem. Unlike a shutter’s blades, blades in an iris are interleaved, so getting
the last few blades installed requires that you slide them under existing blades in the assembly,
starting at the end of the blade circled in red.
In this photo, I am reassembling a 10-blade iris, and I was able to easily lay down six blades.
But at this point, the four remaining
slots are underneath existing blades, and if you slide blades under them, the
existing blades will be pushed out of their slots, resulting in frustration
and wasted time.
How can we install the remaining four blades? We need to slide them under the
red circle, but how?
Fortunately, there is a trick that makes this impossible task possible.
First, let’s define some terms:
- Blade - An iris contains several blades.
- Pin - Each blade has two tiny round pins, usually made of brass, on opposite sidesof the blade.
- Slot-plate and pin-plate - The blades are sandwiched between two round metal plates.
One is stationary, and the other rotates. One contains round holes for holding pins,
and the other has slots for guiding pins. The plate with slots is termed the “slot-plate”,
and the other is termed the “pin-plate”.
If the iris is in a lens, you might be able to remove the iris assembly and access the slots
in the slot-plate from the side of the iris assembly.
If so, you are fortunate, because you can hold the blades down with a weight
such as a socket (for a socket wrench), and slide the blades in from the side.
But if you can’t remove the assembly from the lens, or if the iris is in a shutter,
this technique won’t work.
|
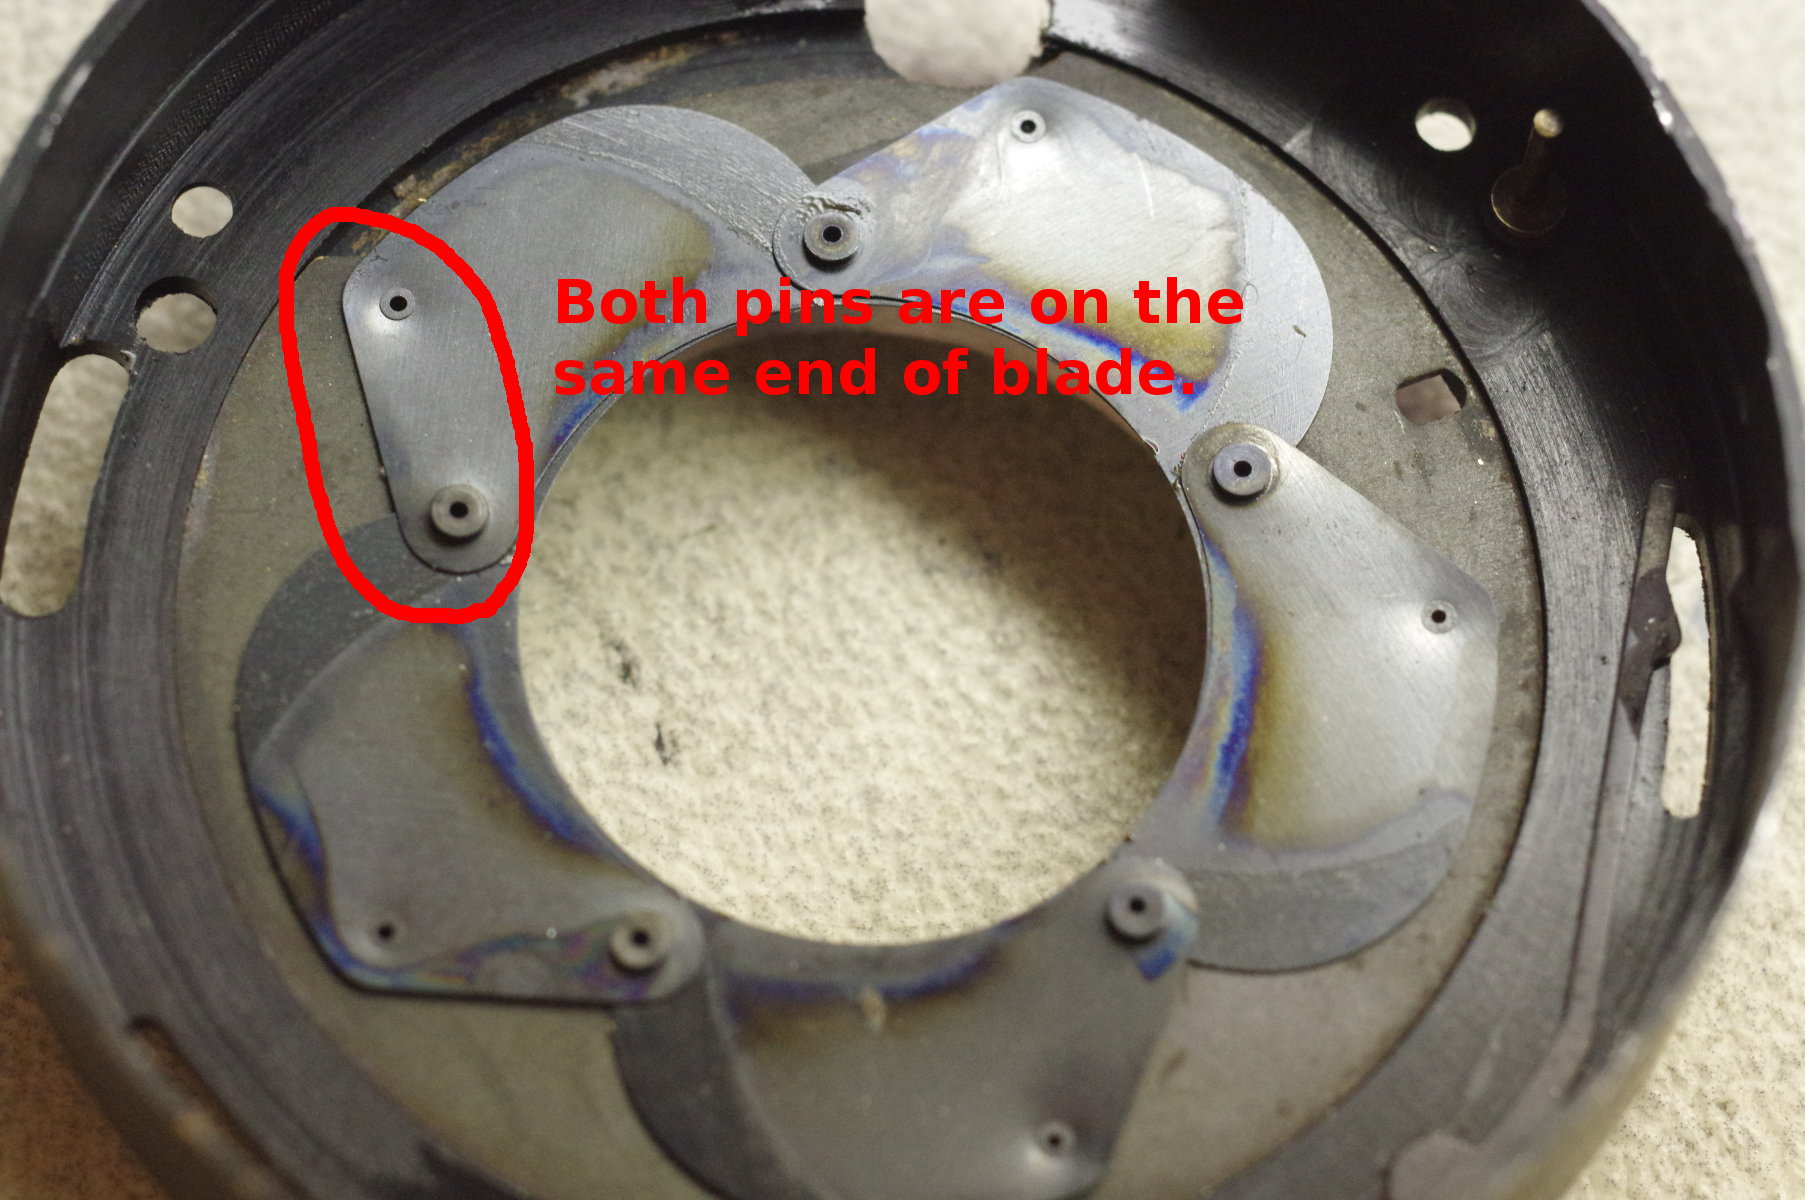 |
Also, some irises have both pins on the same end of each blade (one pin on each side, as before).
This design is used in irises having uniformly spaced f-stop scales, and became popular
in the mid- to late-1950s. As exemplified by
this photo of the iris in a Prontor SVS shutter, such irises usually have only five or so blades,
causing the blades to have little overlap, making them easy to reassemble without resorting to
making a divided plastic disk as described in this article.
The instructions below assume that the pins are on opposite sides of each blade,
and that you cannot slide in blades from the side.
If your f-stop scale has uneven spacing between successive f-stops,
then it almost certainly is the kind described in this article.
The photos in this article show the example of reassembling an iris for a
Seikosha shutter with a 10-blade iris,
which was found in an Aires Viscount 2.8 camera.
Always assemble the blades over the slot-plate, and not the pin-plate. The reason is that
you’ll be sliding each blade along blindly because it will be covered by blades already installed,
and it’s far easier to locate a slot blindly than to locate a hole blindly because
you need not be accurate for a slot — once a pin encounters its slot, it will drop into it
regardless of its location along the slot.
|
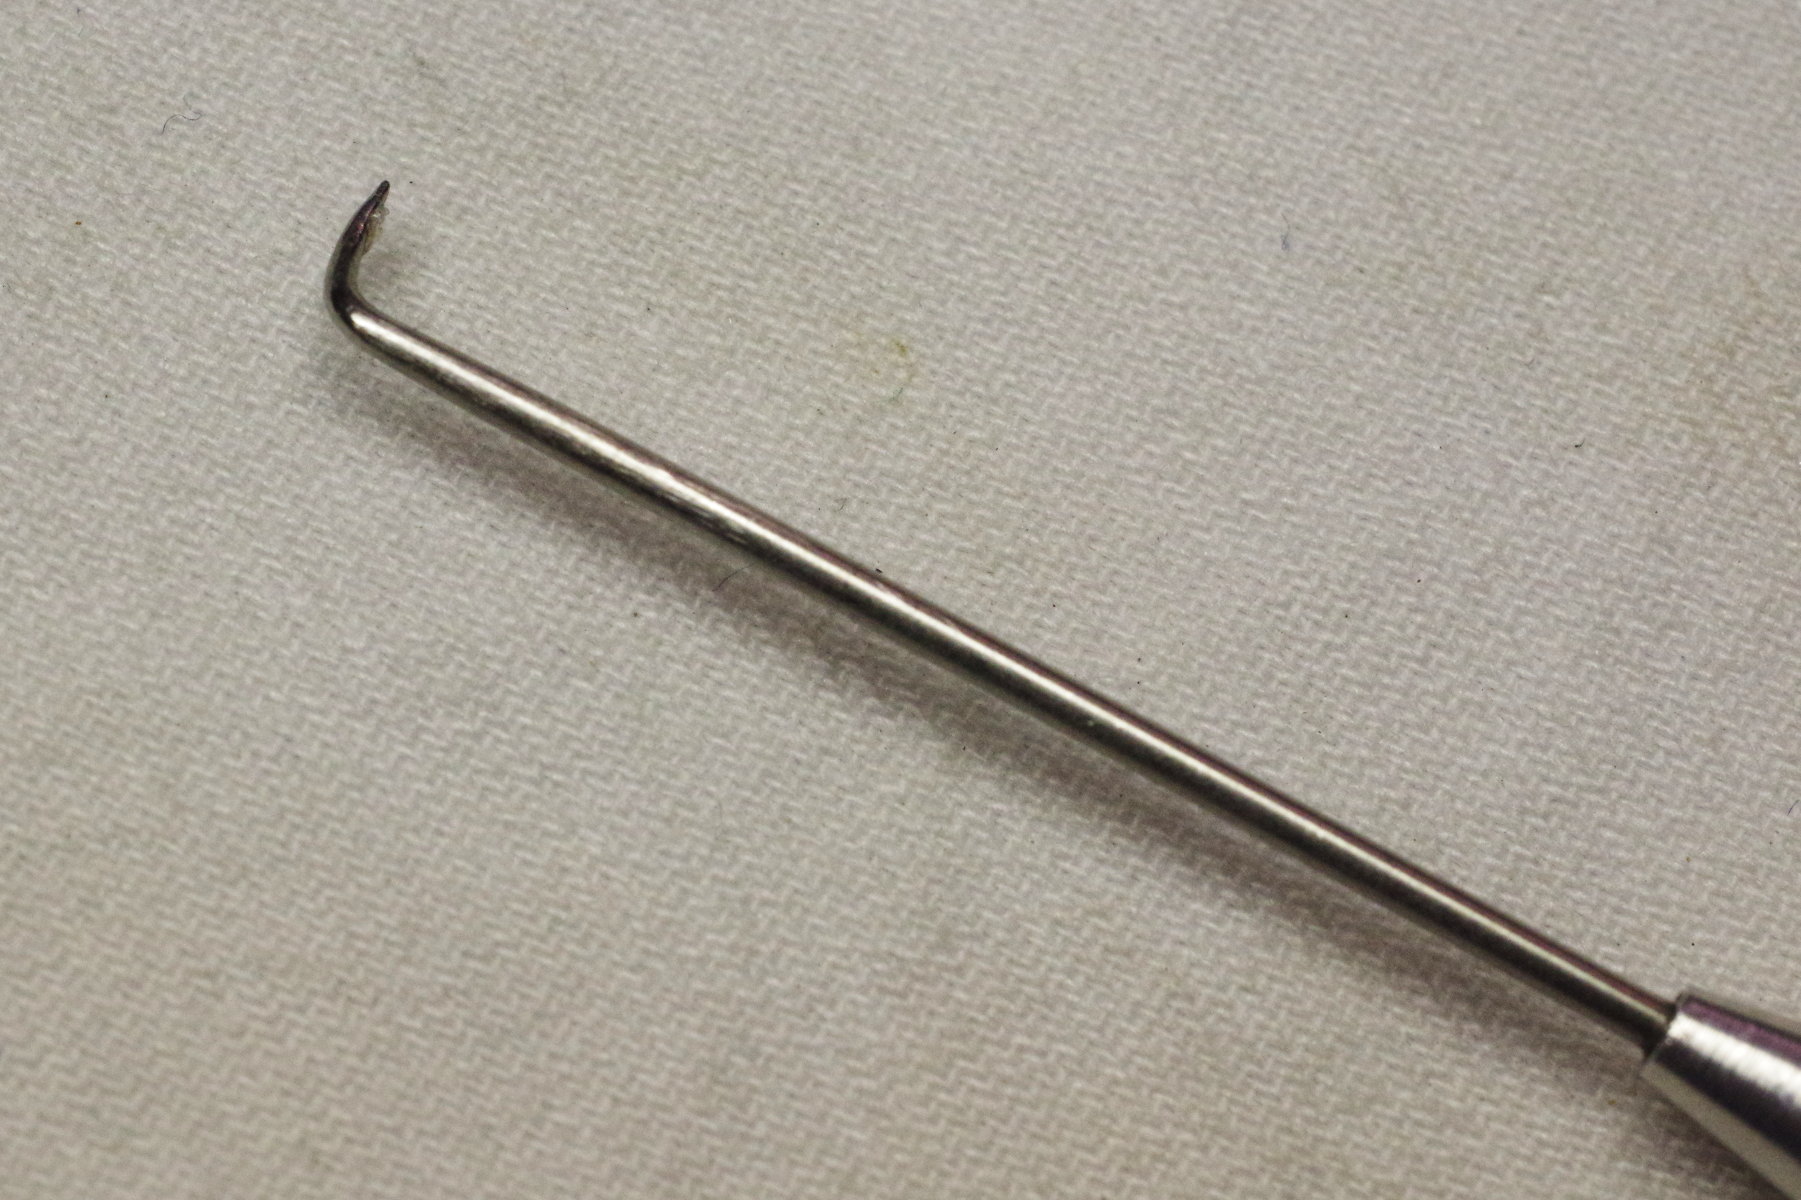 |
Before we start, I suggest that you obtain (or make) an angle-point tool as shown. Its tip is
only a few mm long, and it’s very handy for manipulating springs and parts in shutters,
and blades in an iris.
Also, I recommend cleaning blades and shutter parts in VM&P naphtha or Ronsonol
lighter fluid. Avoid a cleaner claiming to be equivalent to VM&P naphtha,
unless you are certain that it does not contain acetone or MEK (methyl ethyl keytone).
One “equivalent” product I saw contains acetone.
Those solvents damage paints and plastics, whereas VM&P naphtha and lighter fluid
are harmless to such materials, and yet they do a great job of removing oil.
VM&P naphtha can be obtained at hardware stores and paint stores.
|
 |
For some reason, outdoor lighting made my pin-plate look rusty.
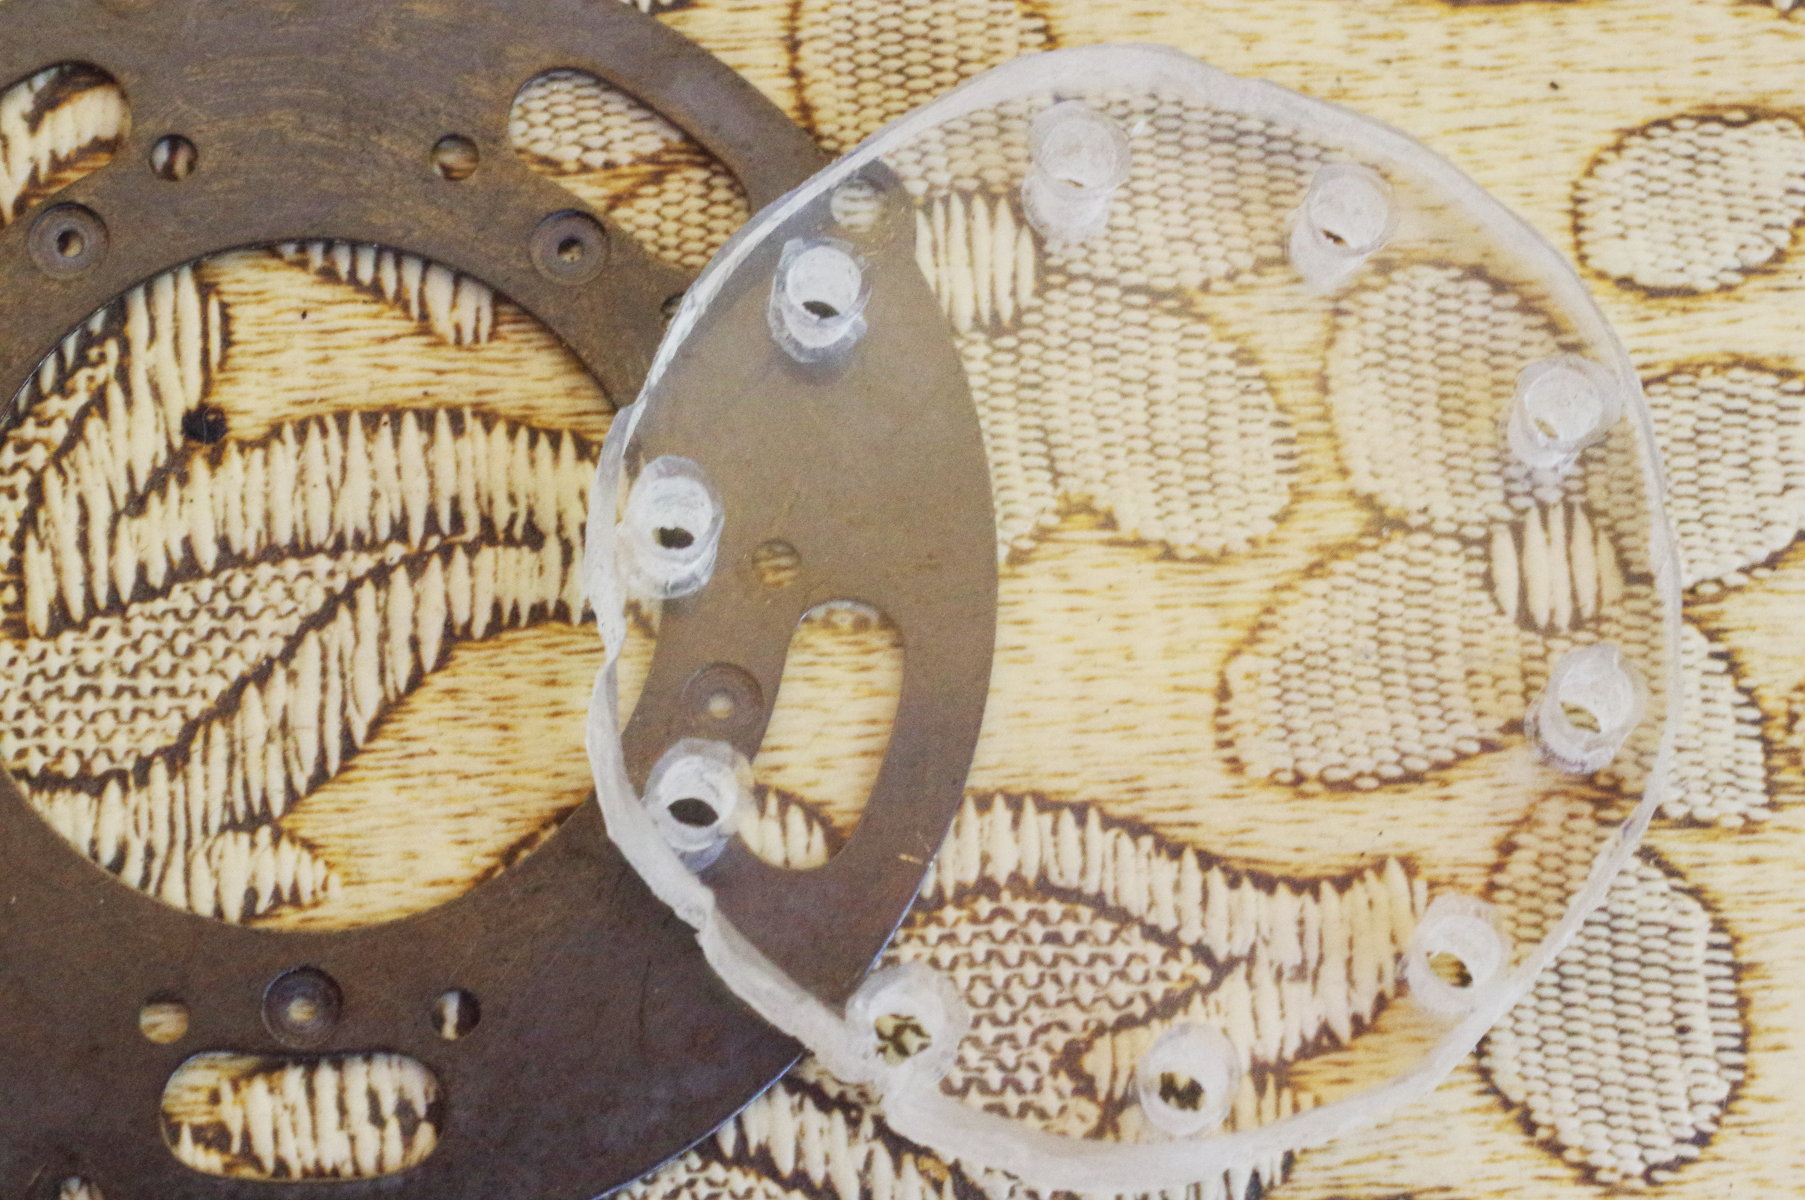
Obtain a piece of clear plastic about 6 mm (0.25 inch) thick. I suppose you can use
thinner plastic such as the clear portion of a CD jewel-case. Lay the pin-plate
on it, and using a felt-tip pen such as a Sharpie, mark the positions of all
pin-holes on the plastic.
Select a drill-bit that’s slightly larger than the diameter of a pin, and
drill holes at the marked positions.
Be sure to remember which side of the plastic had the felt-tip marks on it.
Use a coping saw or a hole saw to cut the plastic into a disk just large enough to
encompass the holes.
|
 |
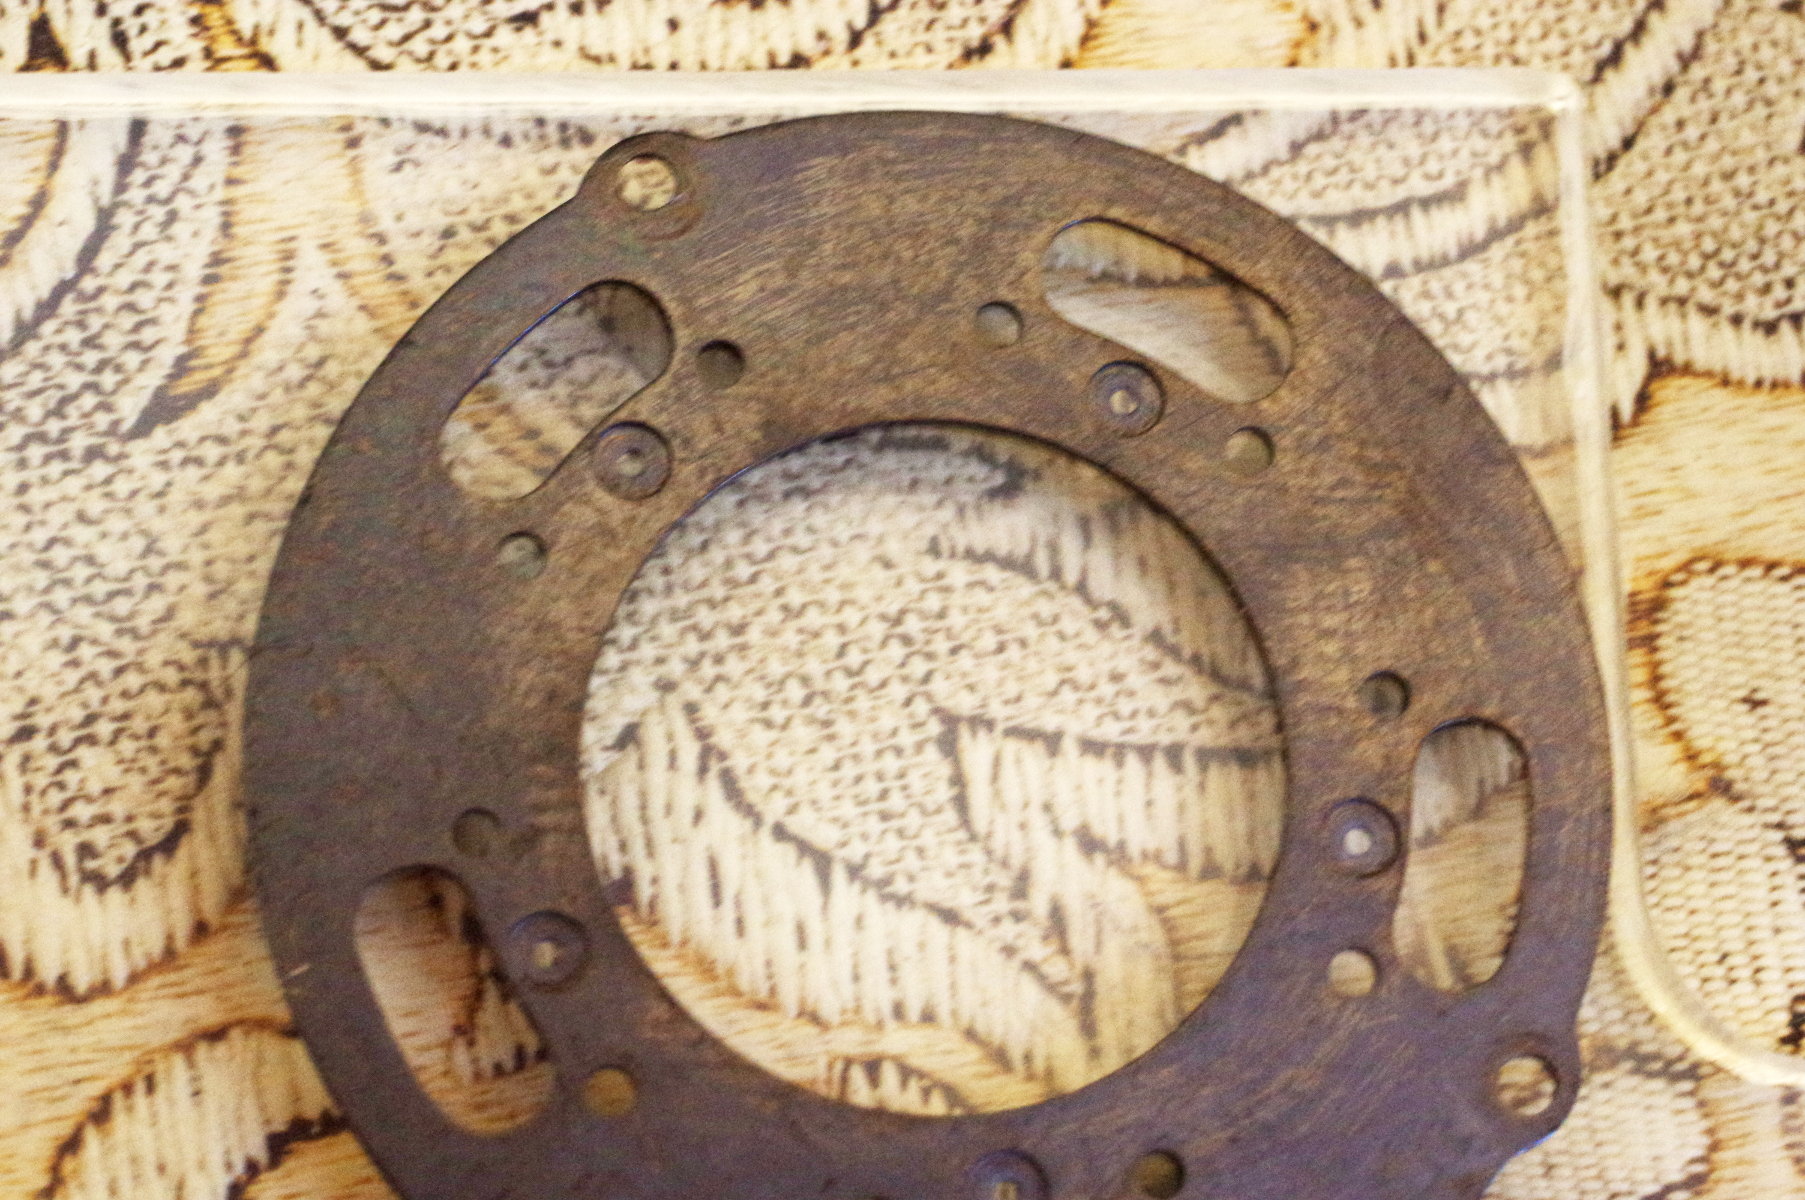
Here’s the resulting plastic disk demonstrating my sloppy work with a coping saw.
|
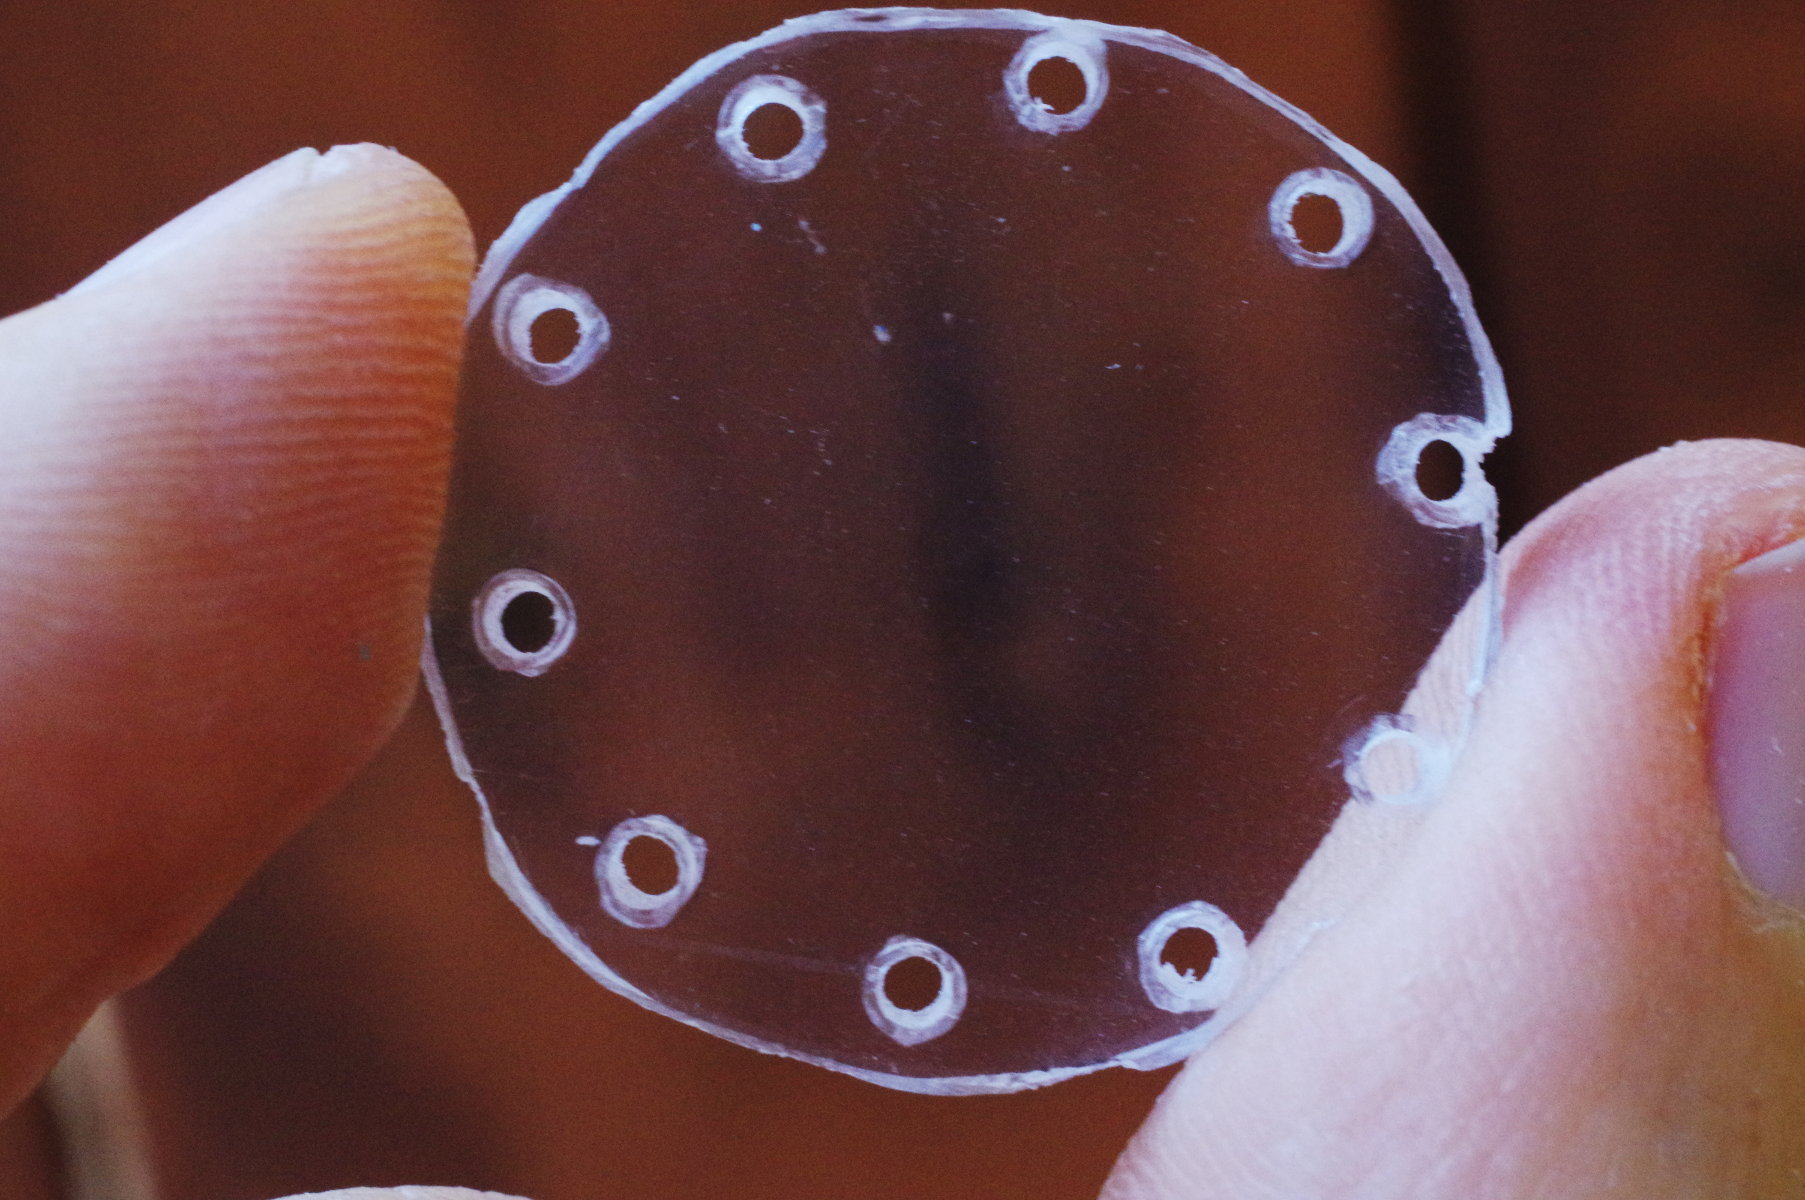 |
Here’s another photo of the disk. You want the perimeter of the disk to be close
to the holes to give yourself space to manipulate the blades with your angle-point tool.
|
 |
After laying down as many blades as possible onto the slot-disk, you have some remaining blades that
will need to be slid under the existing blades that you laid down.
Let N be the number of these remaining blades. In these photos, N = 4.
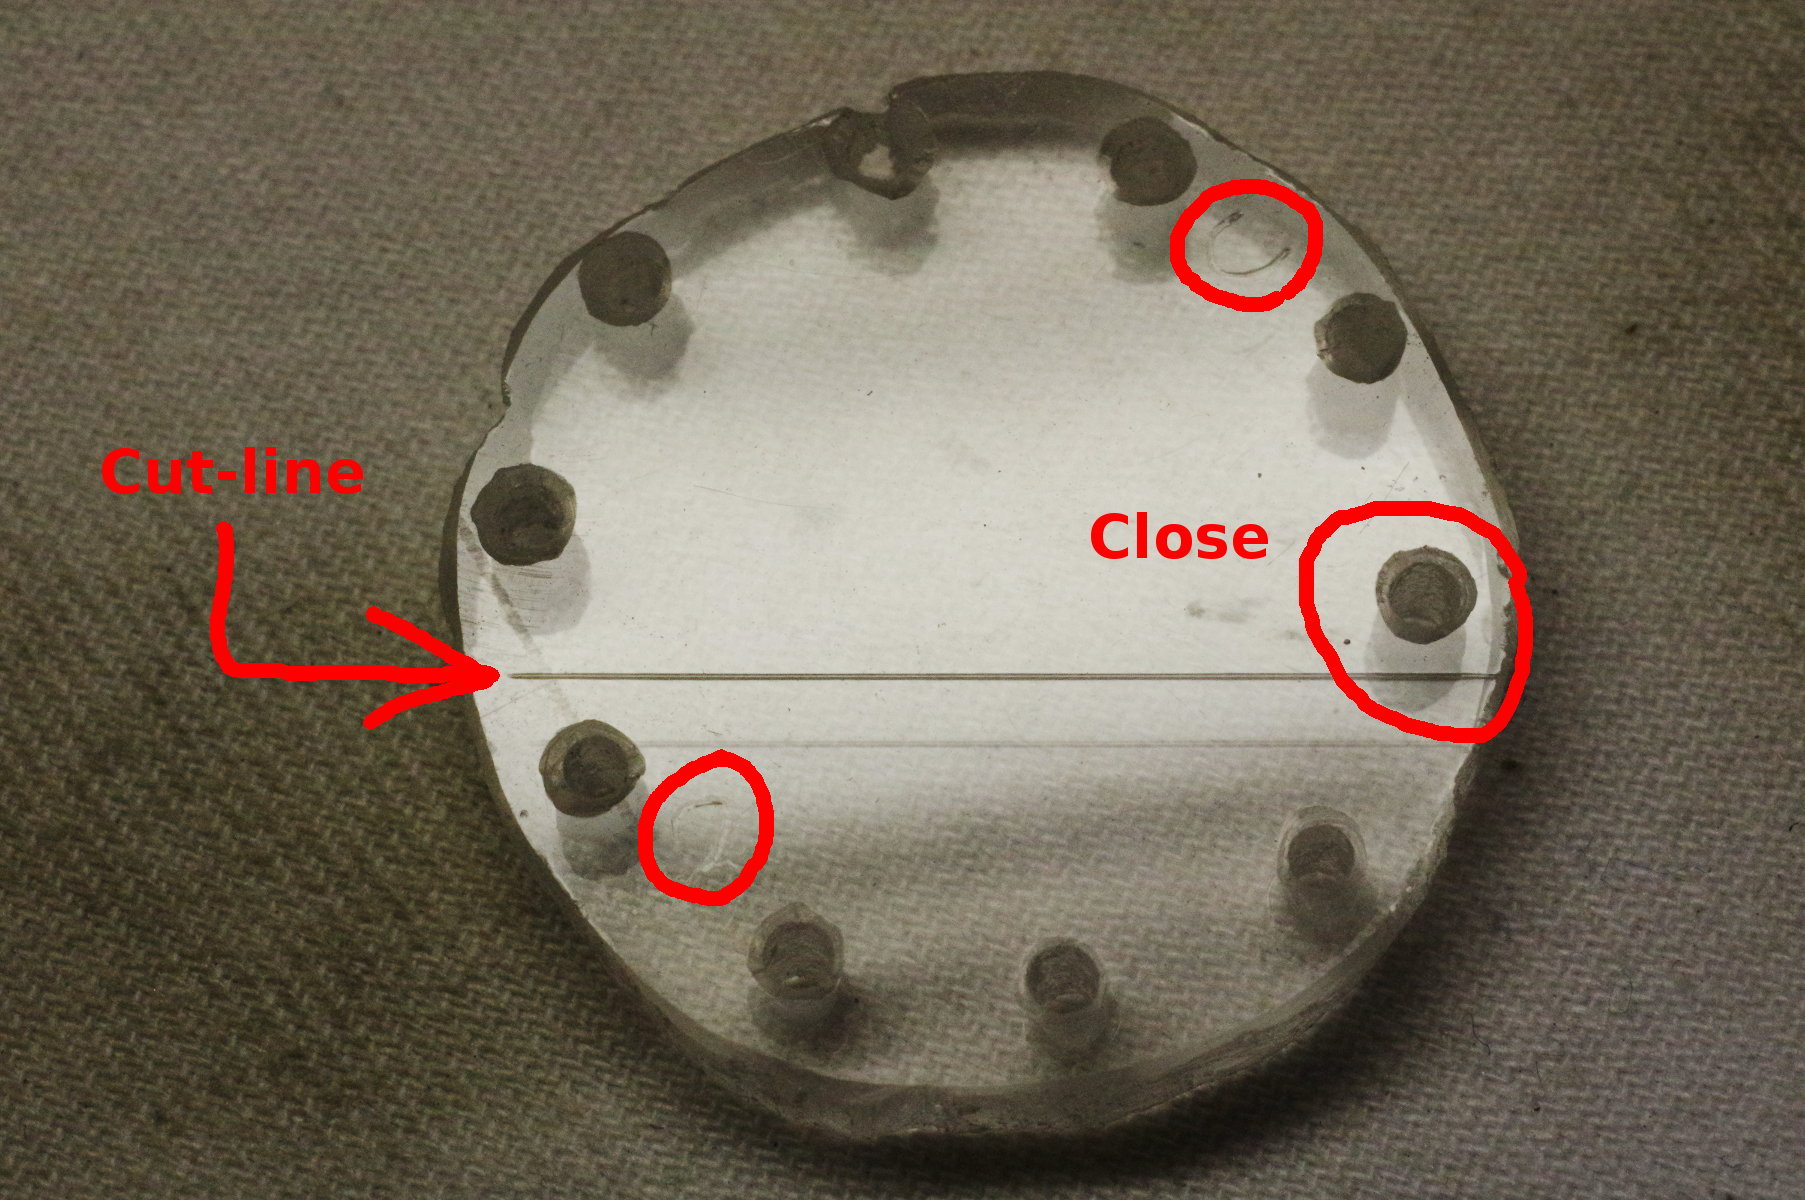
Scratch a cut-line on the plastic that leaves N holes under the line. Identify which blade the
remaining blades will slide under, which is the first blade you laid down.
Make your cut-line pass close to its hole
because the end of that blade must not be covered by plastic,
so that you can slip the remaining blades under it.
Remembering which side had the felt-tip marks on it, scratch two “U” symbols on the other side
of the plastic, on both sides of the cut-line. These are circled in red in this photo
at the 1:30 and 7:30 positions. “U” stands for “up”; the holes on the felt-tip side of the
plastic disk (which will be the down-side) are more accurately positioned than on the up-side
because your hand-drill was not perfectly level.
But if you drilled the holes with a drill-press, the holes on both sides are equally accurate,
and you need not concern yourself with which side is up.
|
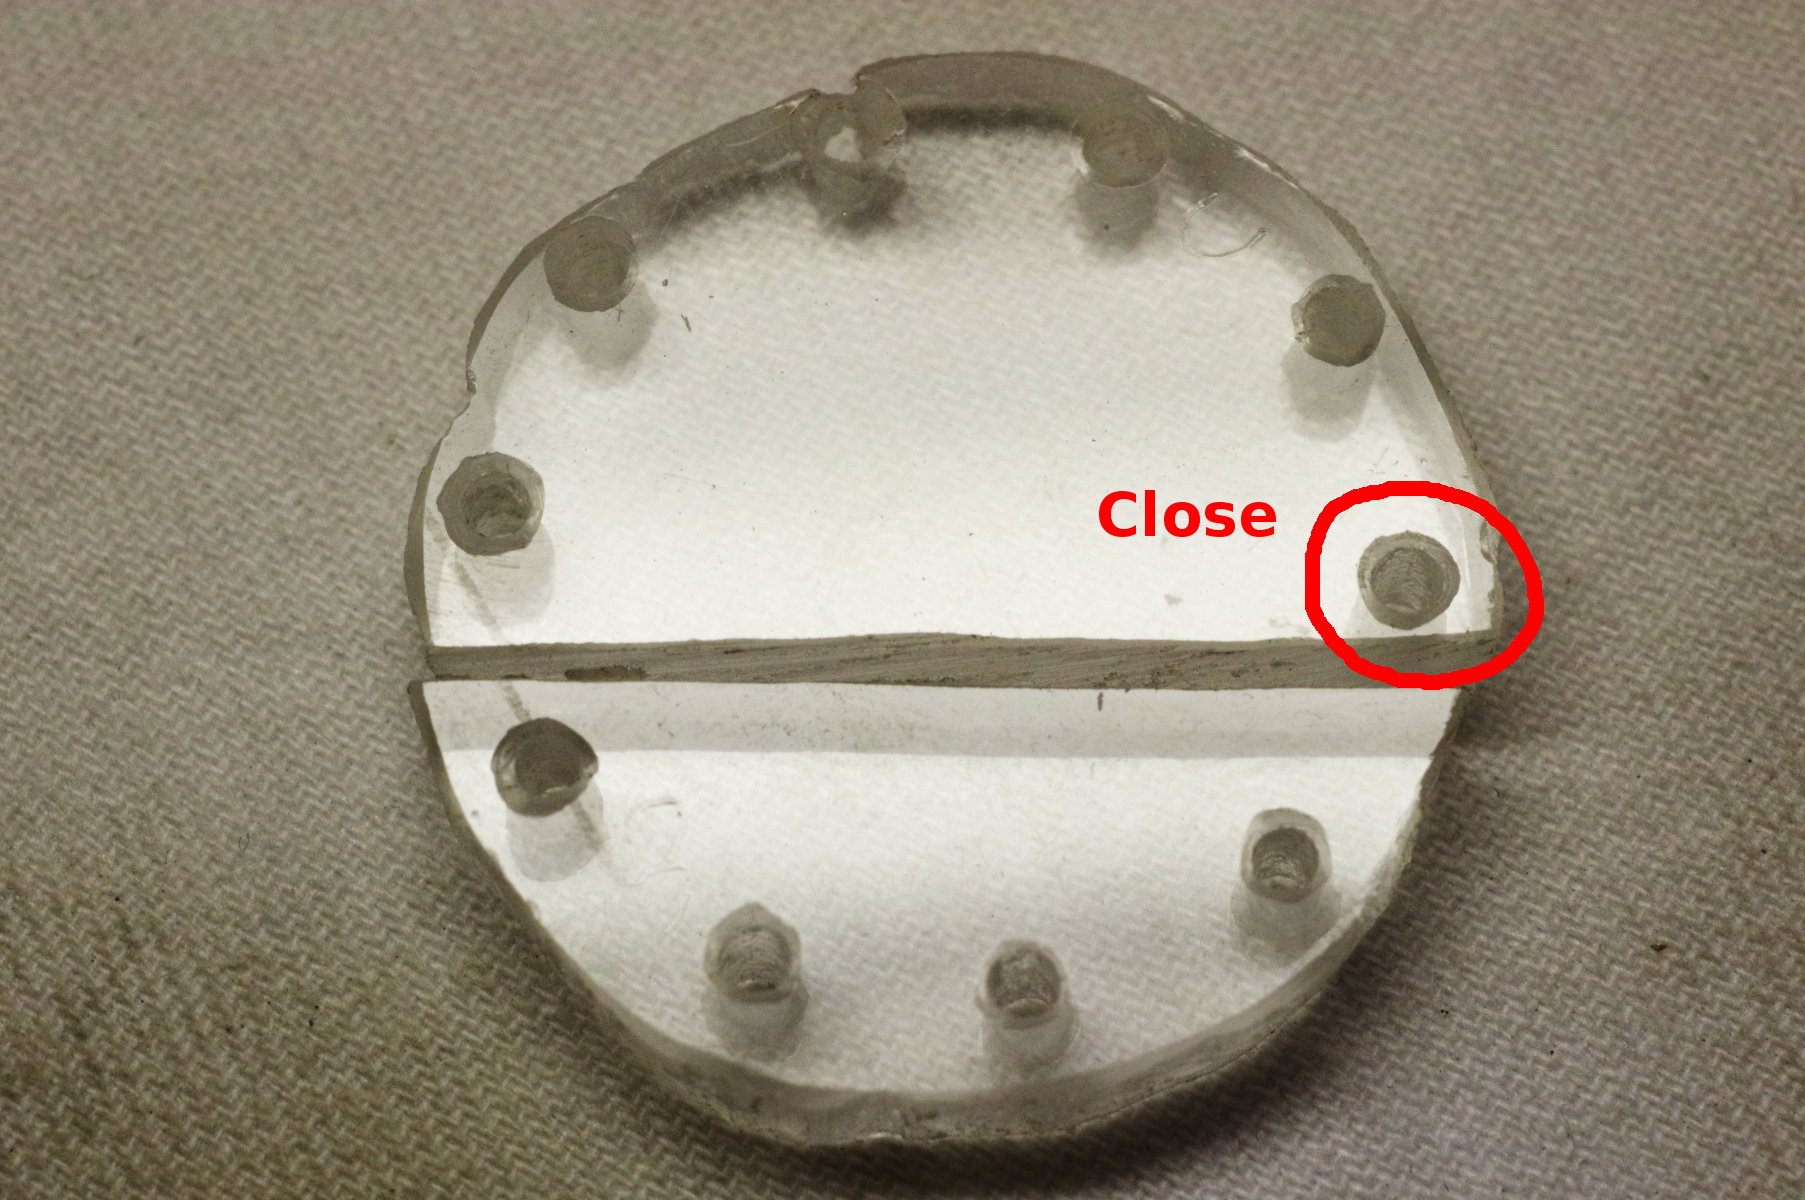 |
You now have two pieces of plastic, and you will use both of them, so don’t discard either.
Note how close the cut is to the hole for the blade under which the remaining blades will
be slid.
|
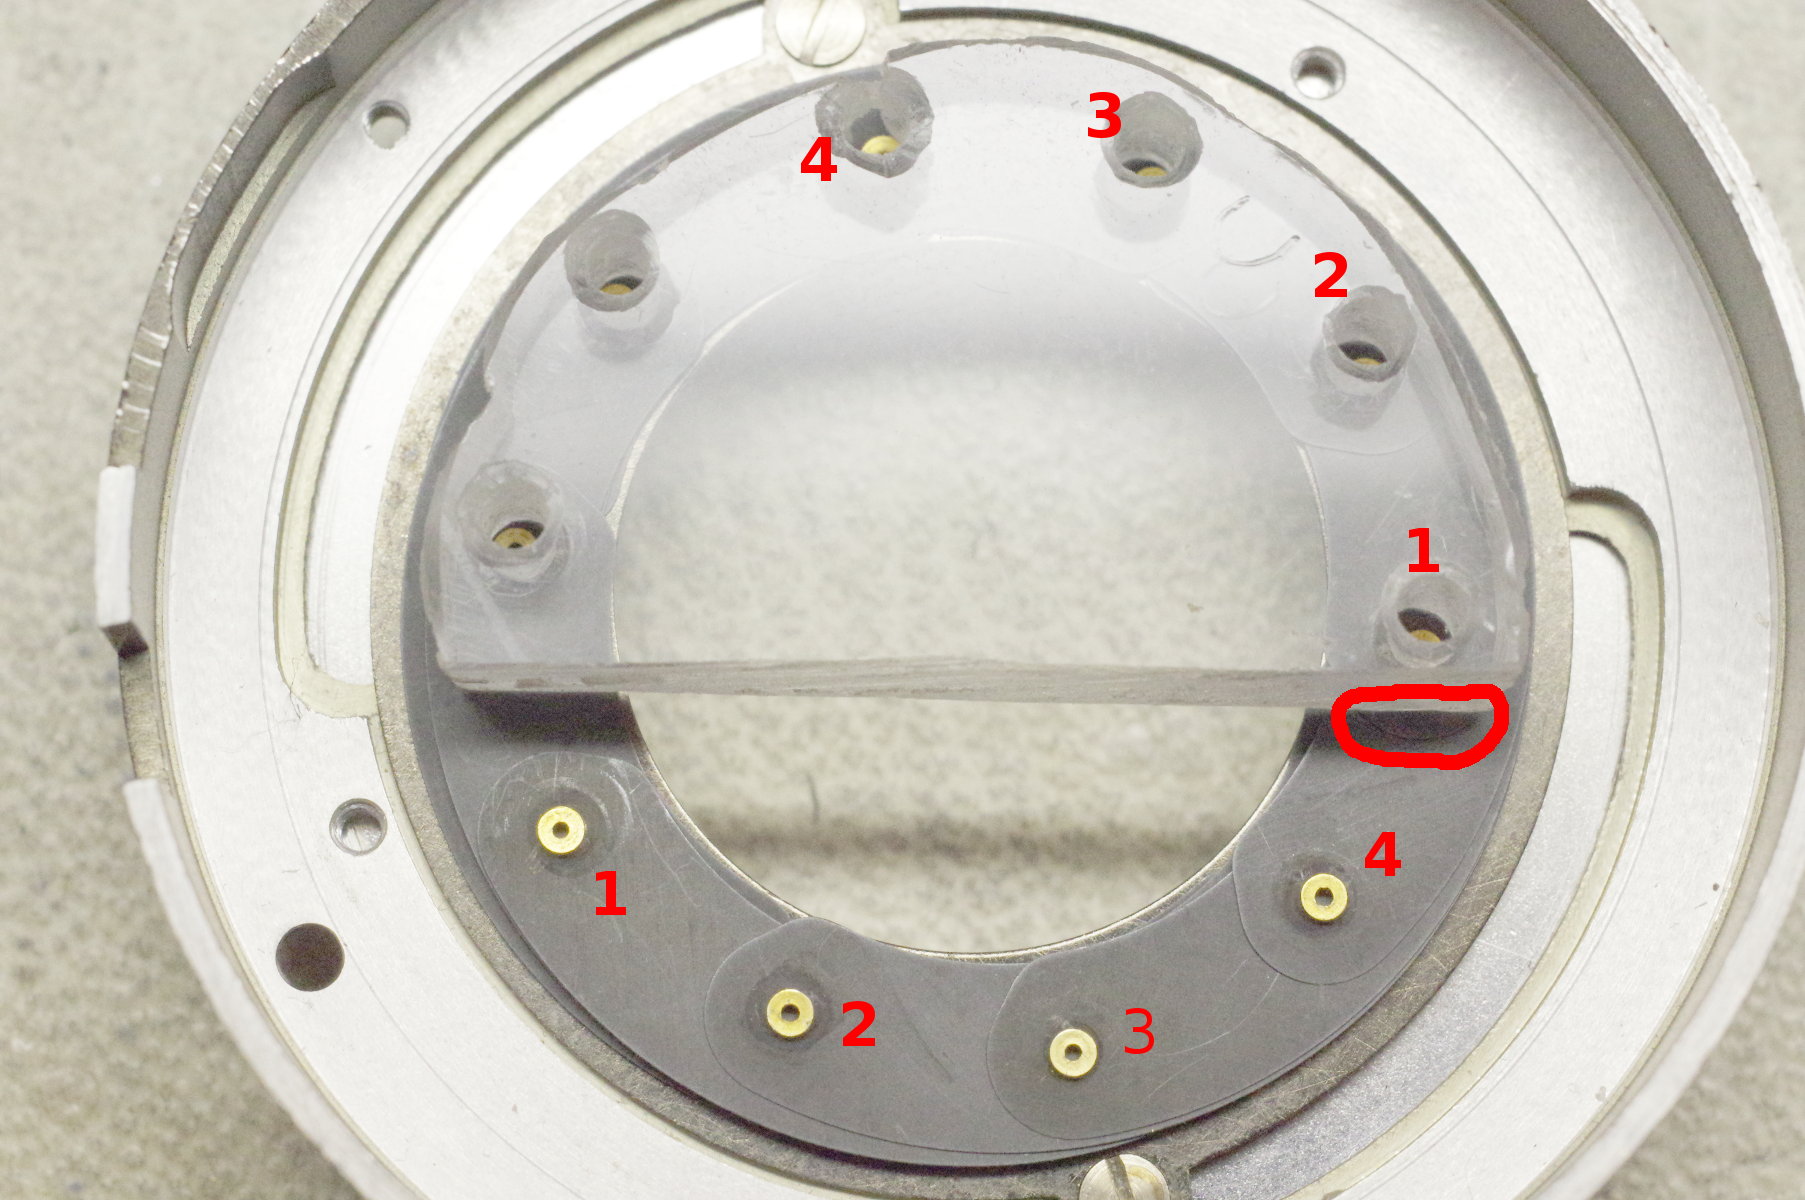 |
In this step, you will place the remaining blades in the iris.
Place the large piece of plastic over the blades already on the slot-plate, with
its holes aligned with their pins as shown.
A part of the first blade you laid down should protrude under the plastic, as circled in red
in this photo. While holding the plastic down with a finger, slide the remaining
blades under this protruding blade. In my case, I first slid the blade marked “1” (7:30 position
in the photo), and its right end dropped into the slot marked “1” at the 3:00 position.
Likewise, blade 2 needed to be slid farther to reach its slot (marked “2”)
at the 2:00 position. Blade 4 travelled the farthest. Like all four blades, it started
by sliding under the protruding blade at the 3:30 position, and travelled all the way around to
the 11:30 position before dropping into its slot.
The clear plastic allows you to see the positions of blades under it.
If a blade starts wandering into the throat,
you’ll see it through the plastic, and can reach underneath and push it
back into place with your angle-point tool. This is why I recommend using clear
plastic instead of wood.
|
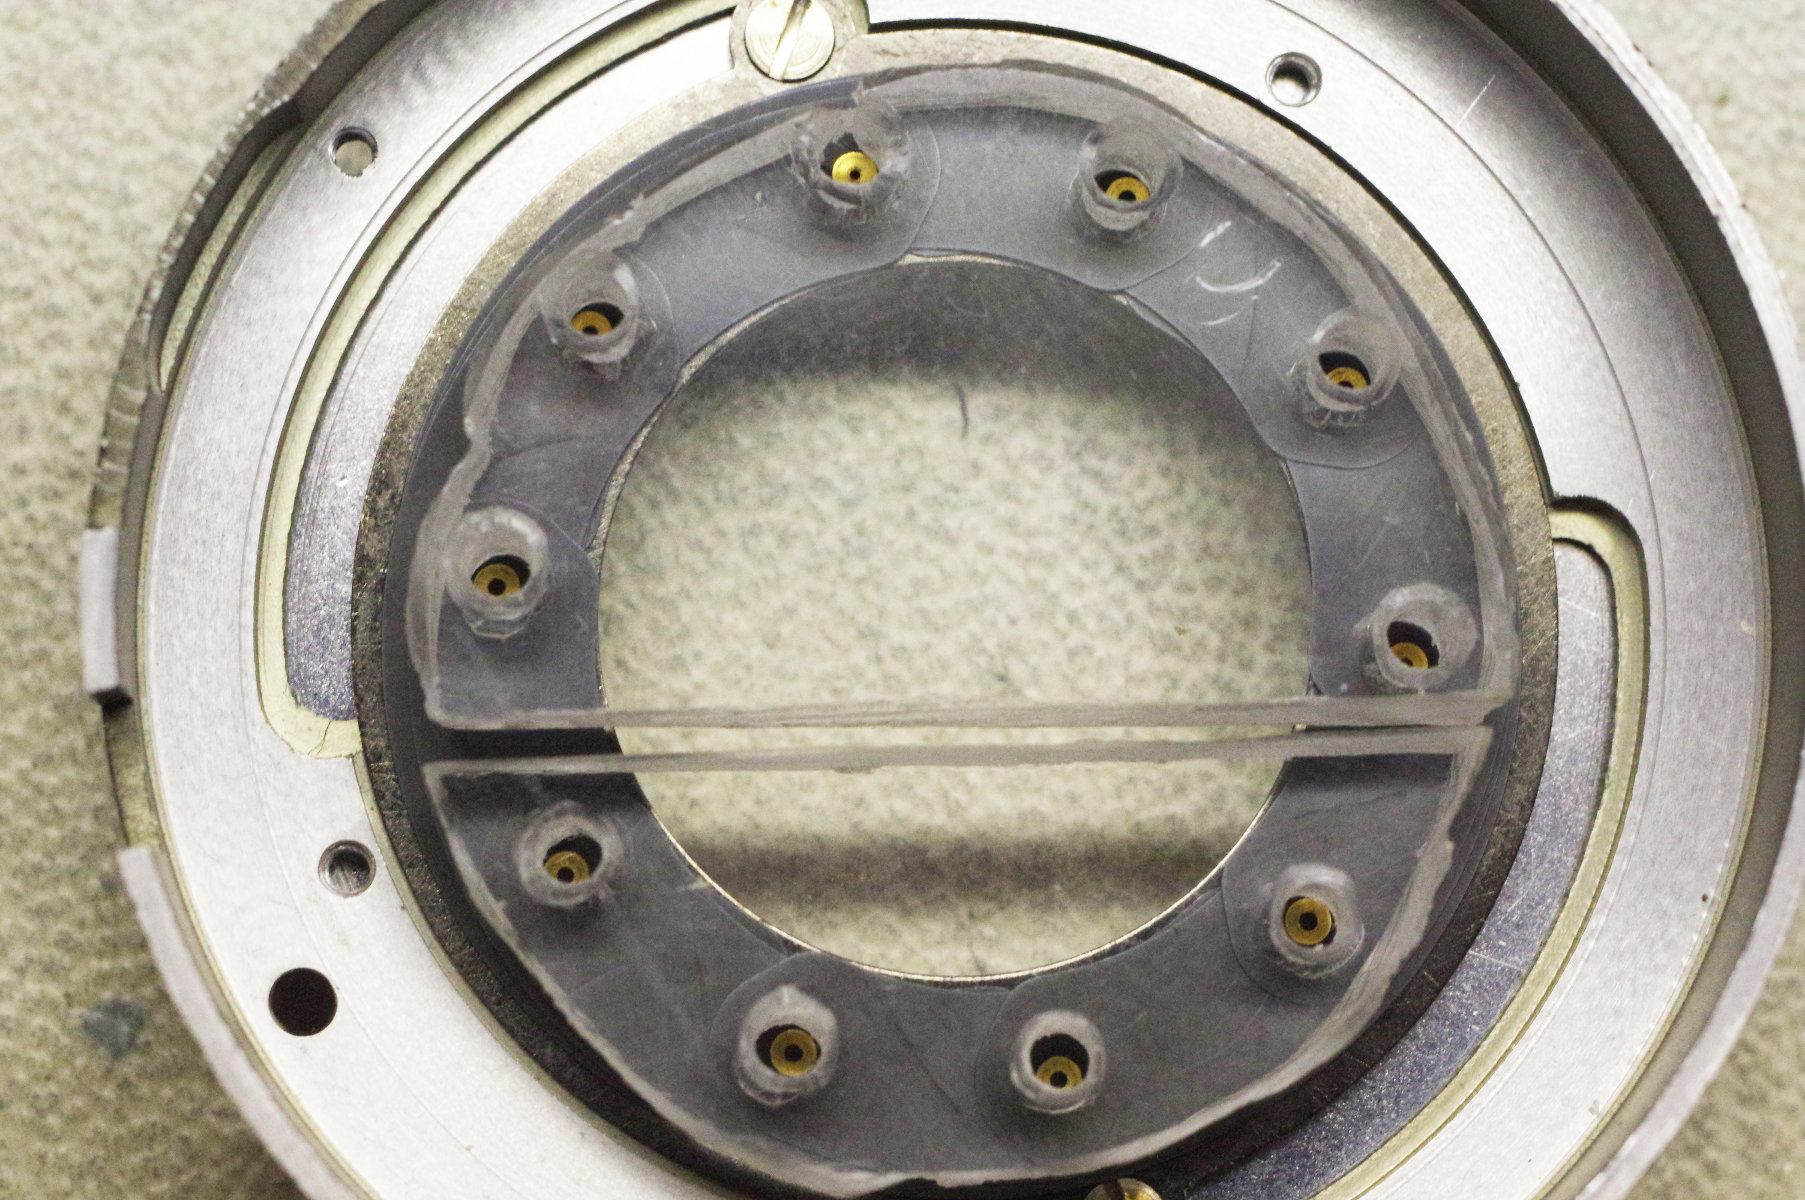 |
Place the smaller piece of plastic on the iris, and manipulate both to position
all the pins correctly.
|
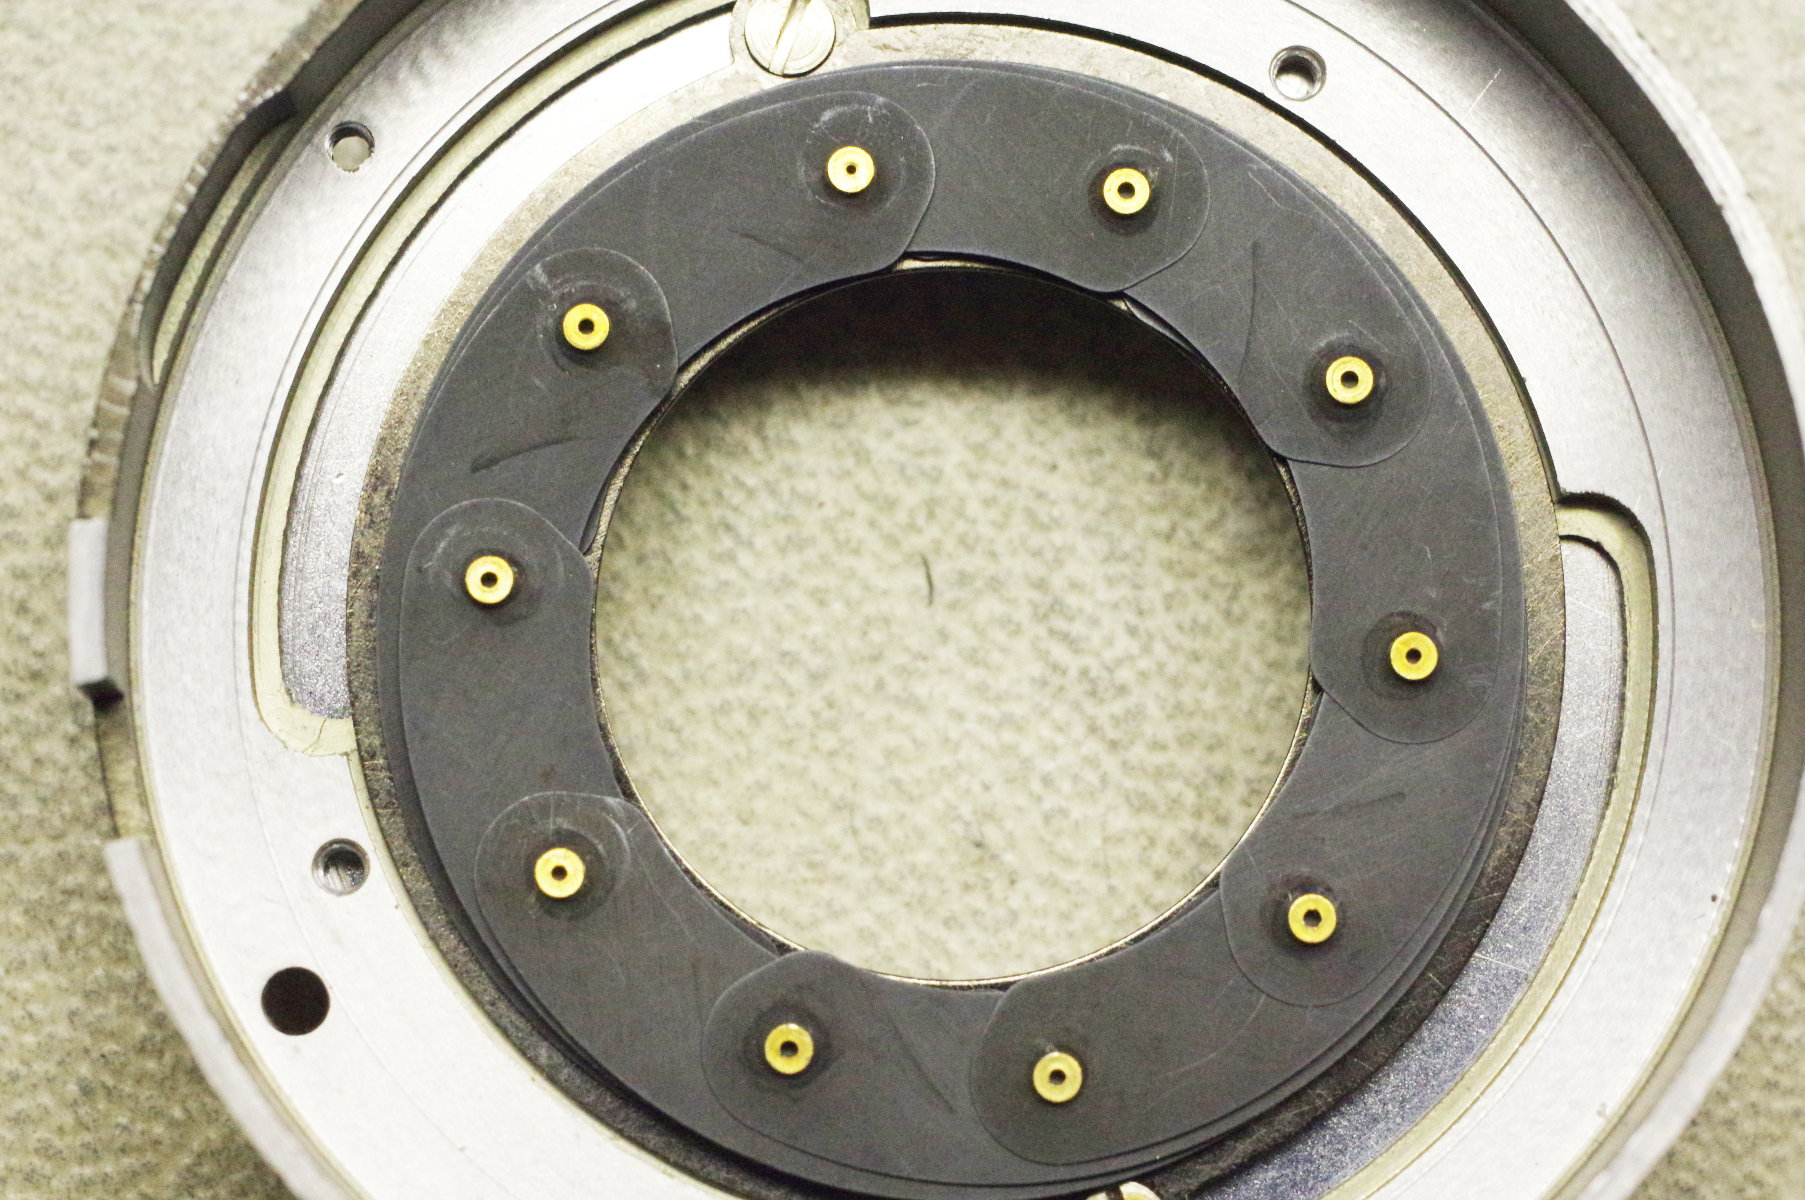 |
My hands are not steady enough to lift off a piece of plastic without disturbing
the blades, so I lifted the two plastic pieces with a long-nose pliars that I
steadied carefully with my free hand, revealing this beautiful iris.
|
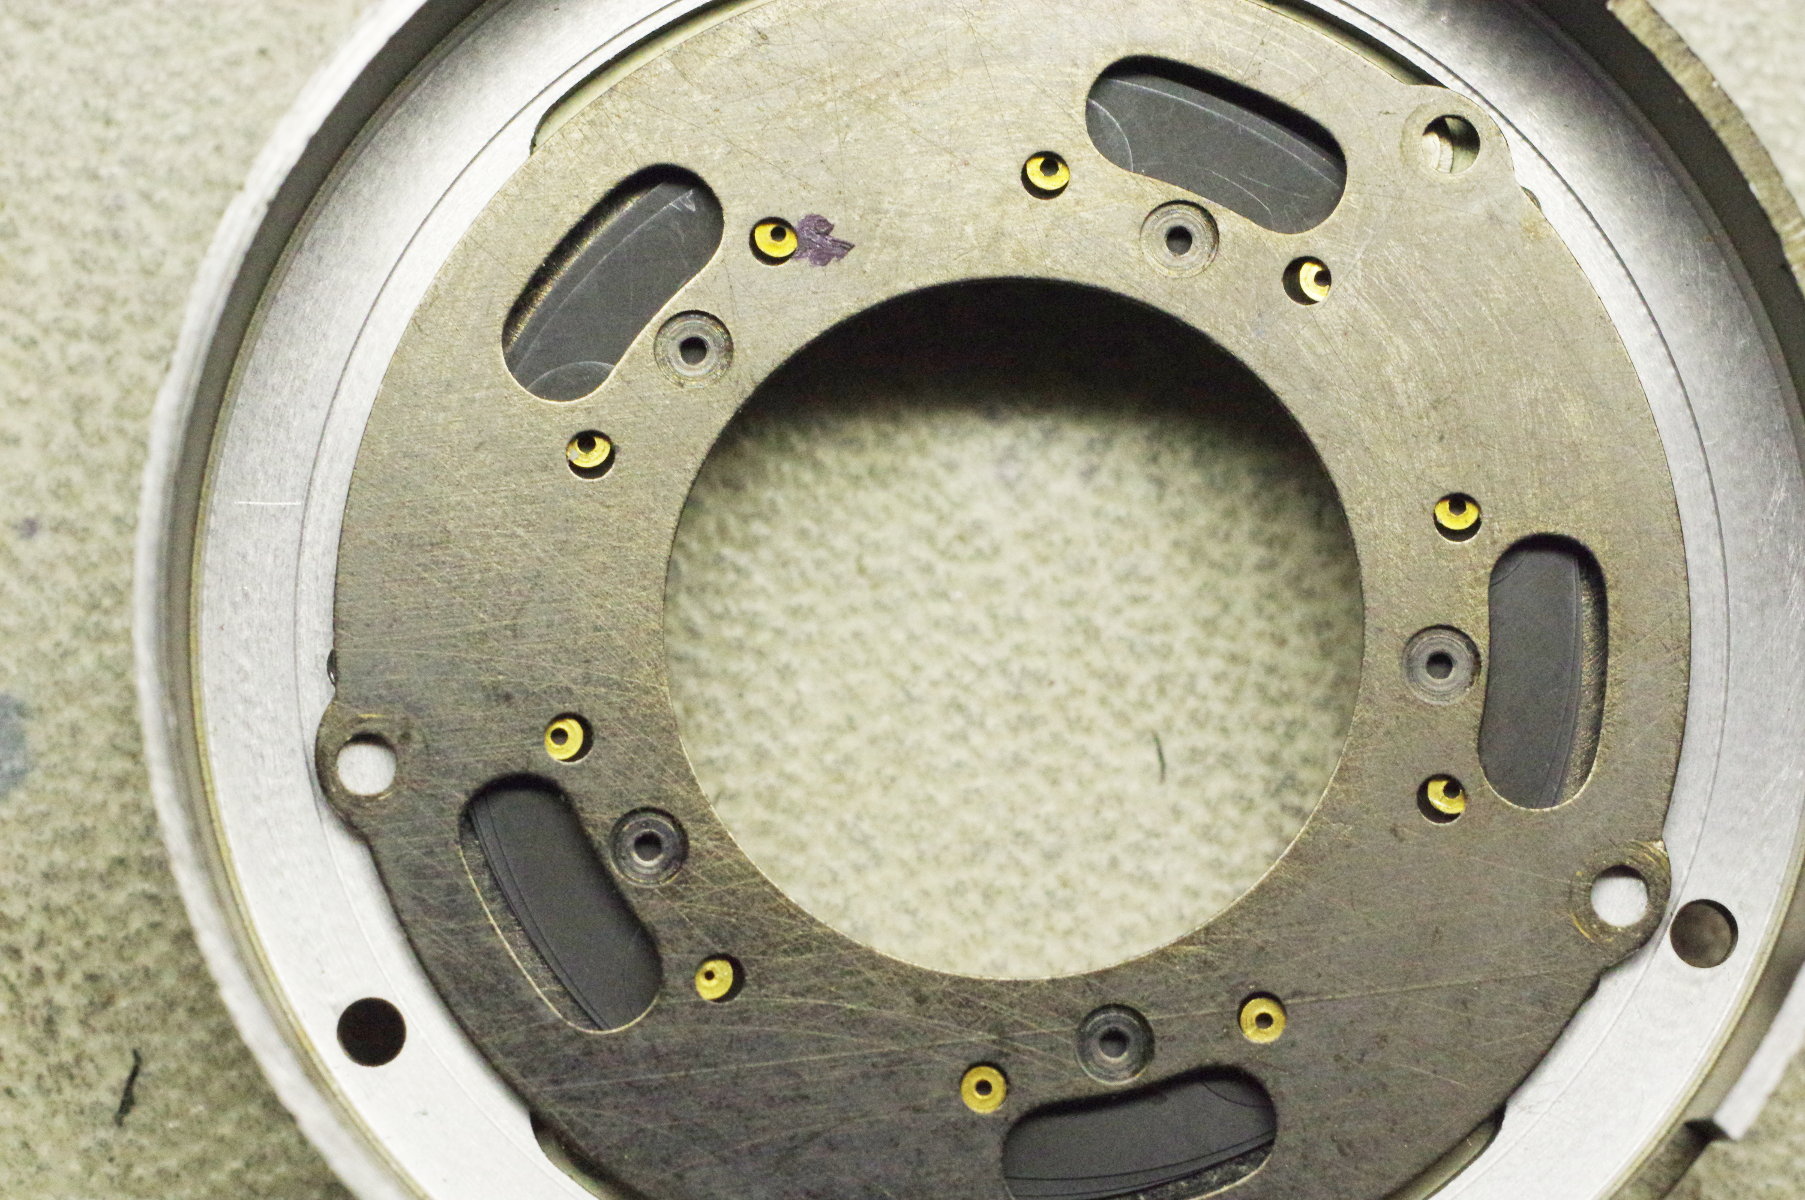 |
I carefully laid the pin-plate on the iris, and took this photo. The pins are
close enough that all of them are visible in their holes. Use the angle-point
tool to align the pins with their holes. Then rotate and shift the pin-plate as needed
to position it correctly, and screw it down.
My pin-plate does not look rusty under florescent lighting.
|
 |
Here is the result, stopped down some. Whew!
After all this effort to reassemble the iris, perhaps good advice would be to
never disassemble such an iris. If it’s oily, you can immerse it in solvent
while opening and closing it for 45 minutes, and still save time compared
to making the divided plastic disk described above. But if you want to be
certain that every trace of oil is gone, you have no choice but to disassemble
the iris.
|