 |
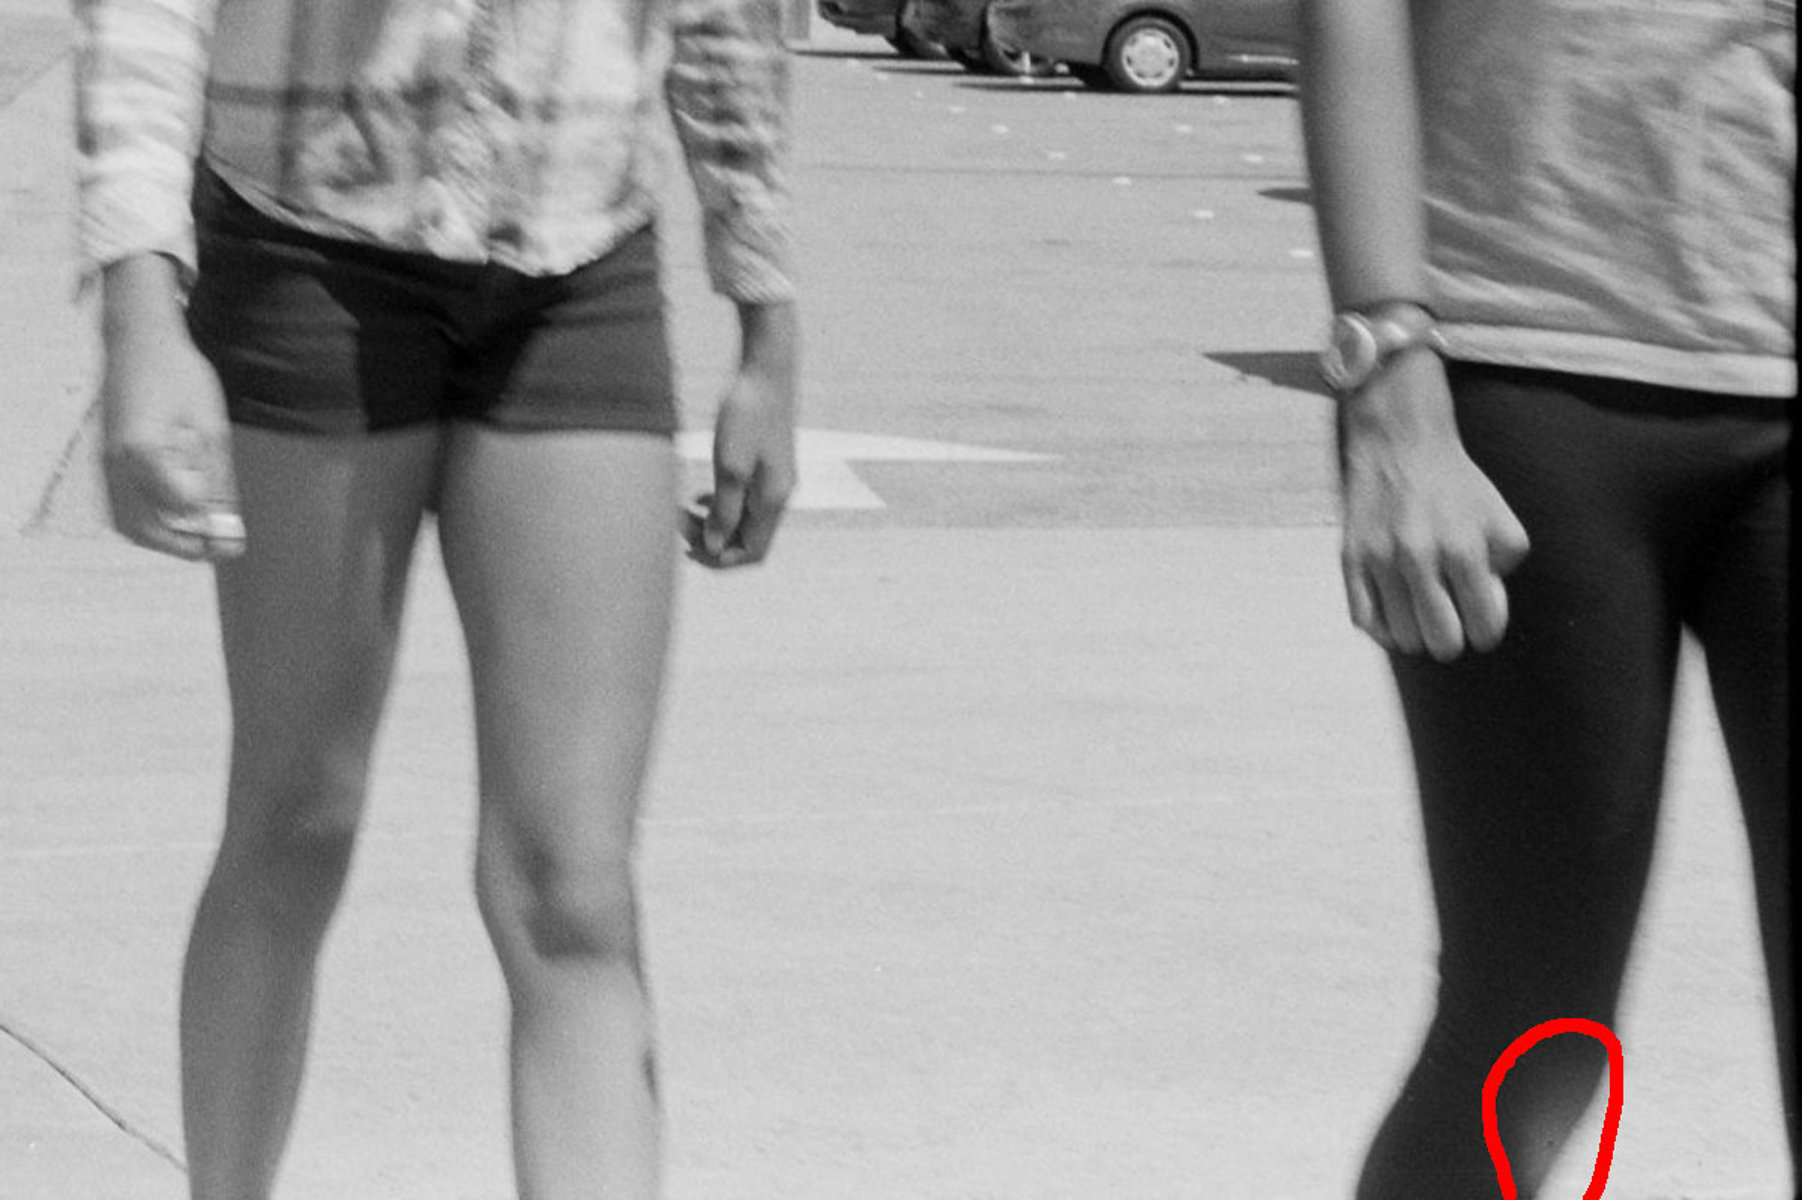
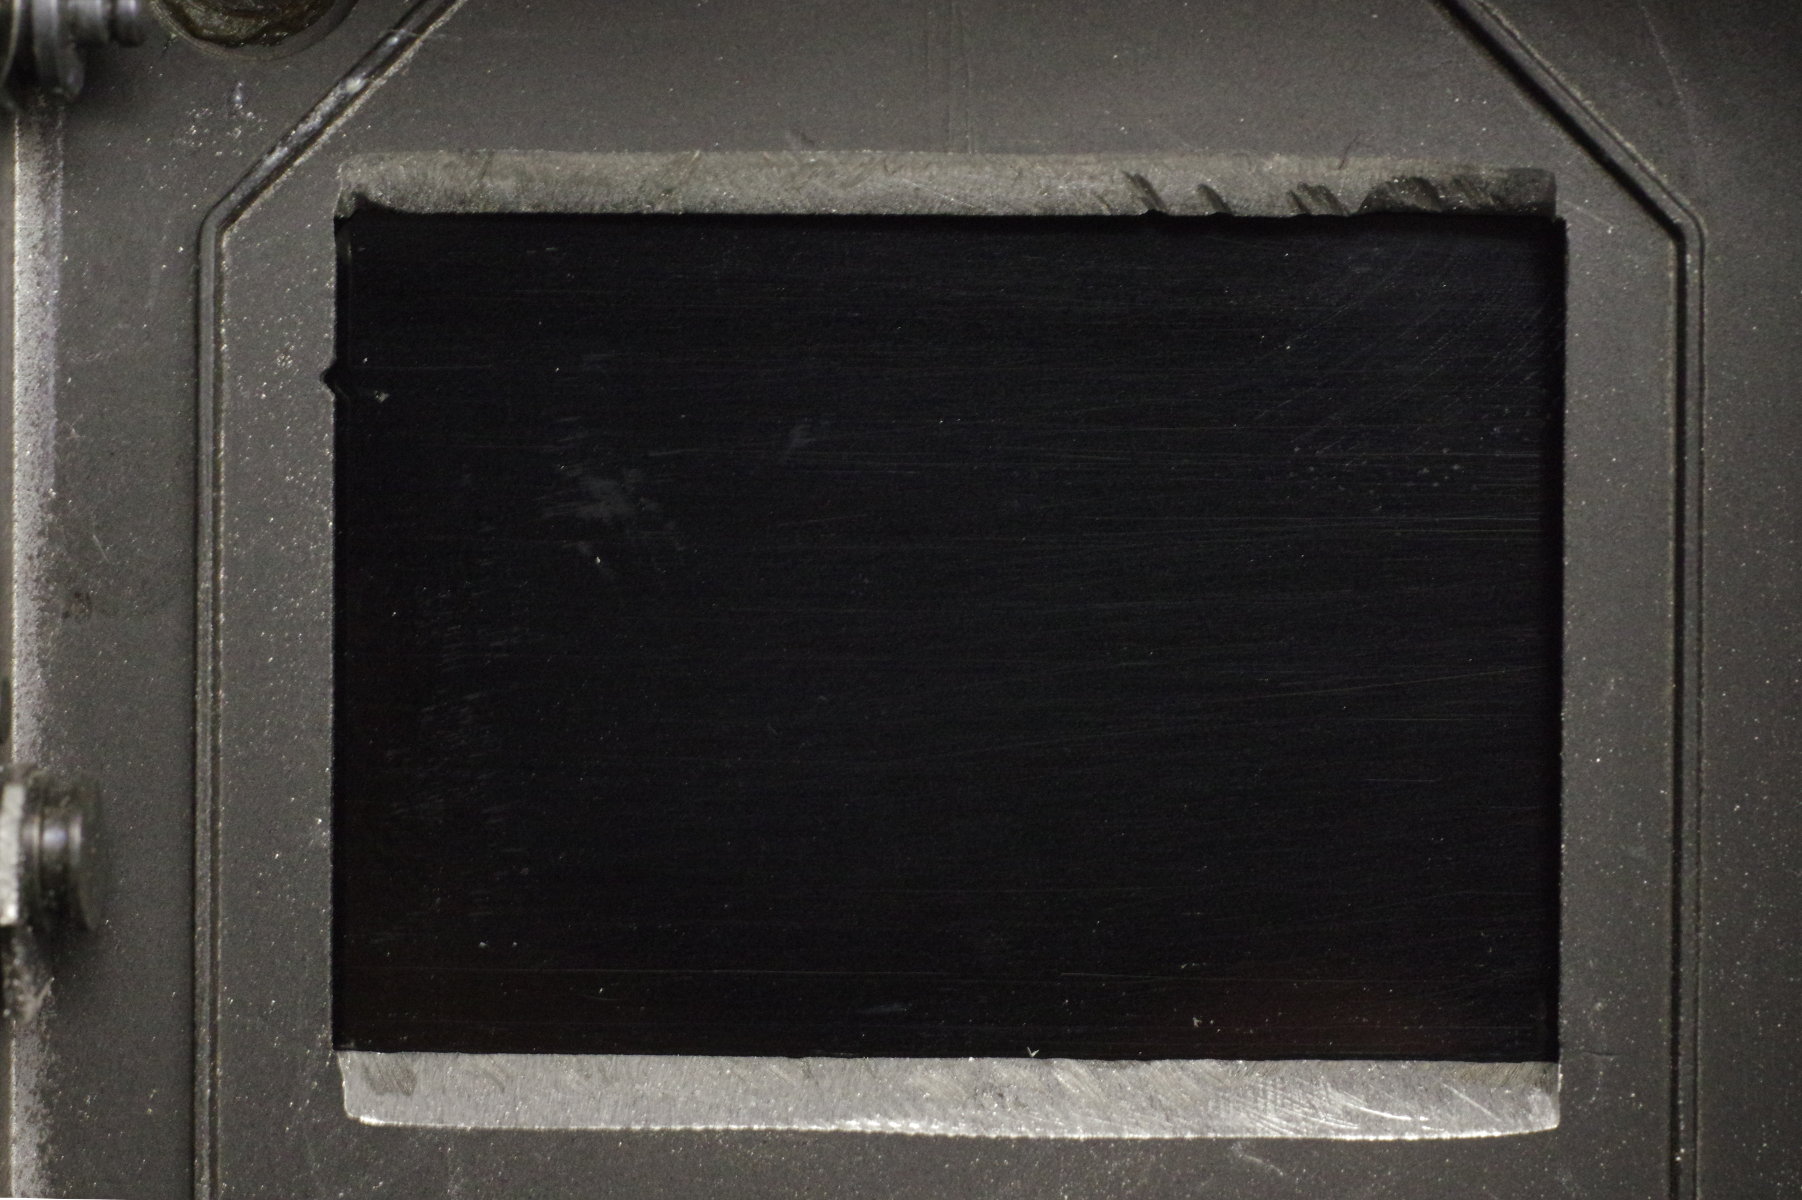
Here’s a crop of a picture taken with a Kodak Retina Automatic III.
What caused that flare on the bottom circled in red?
|
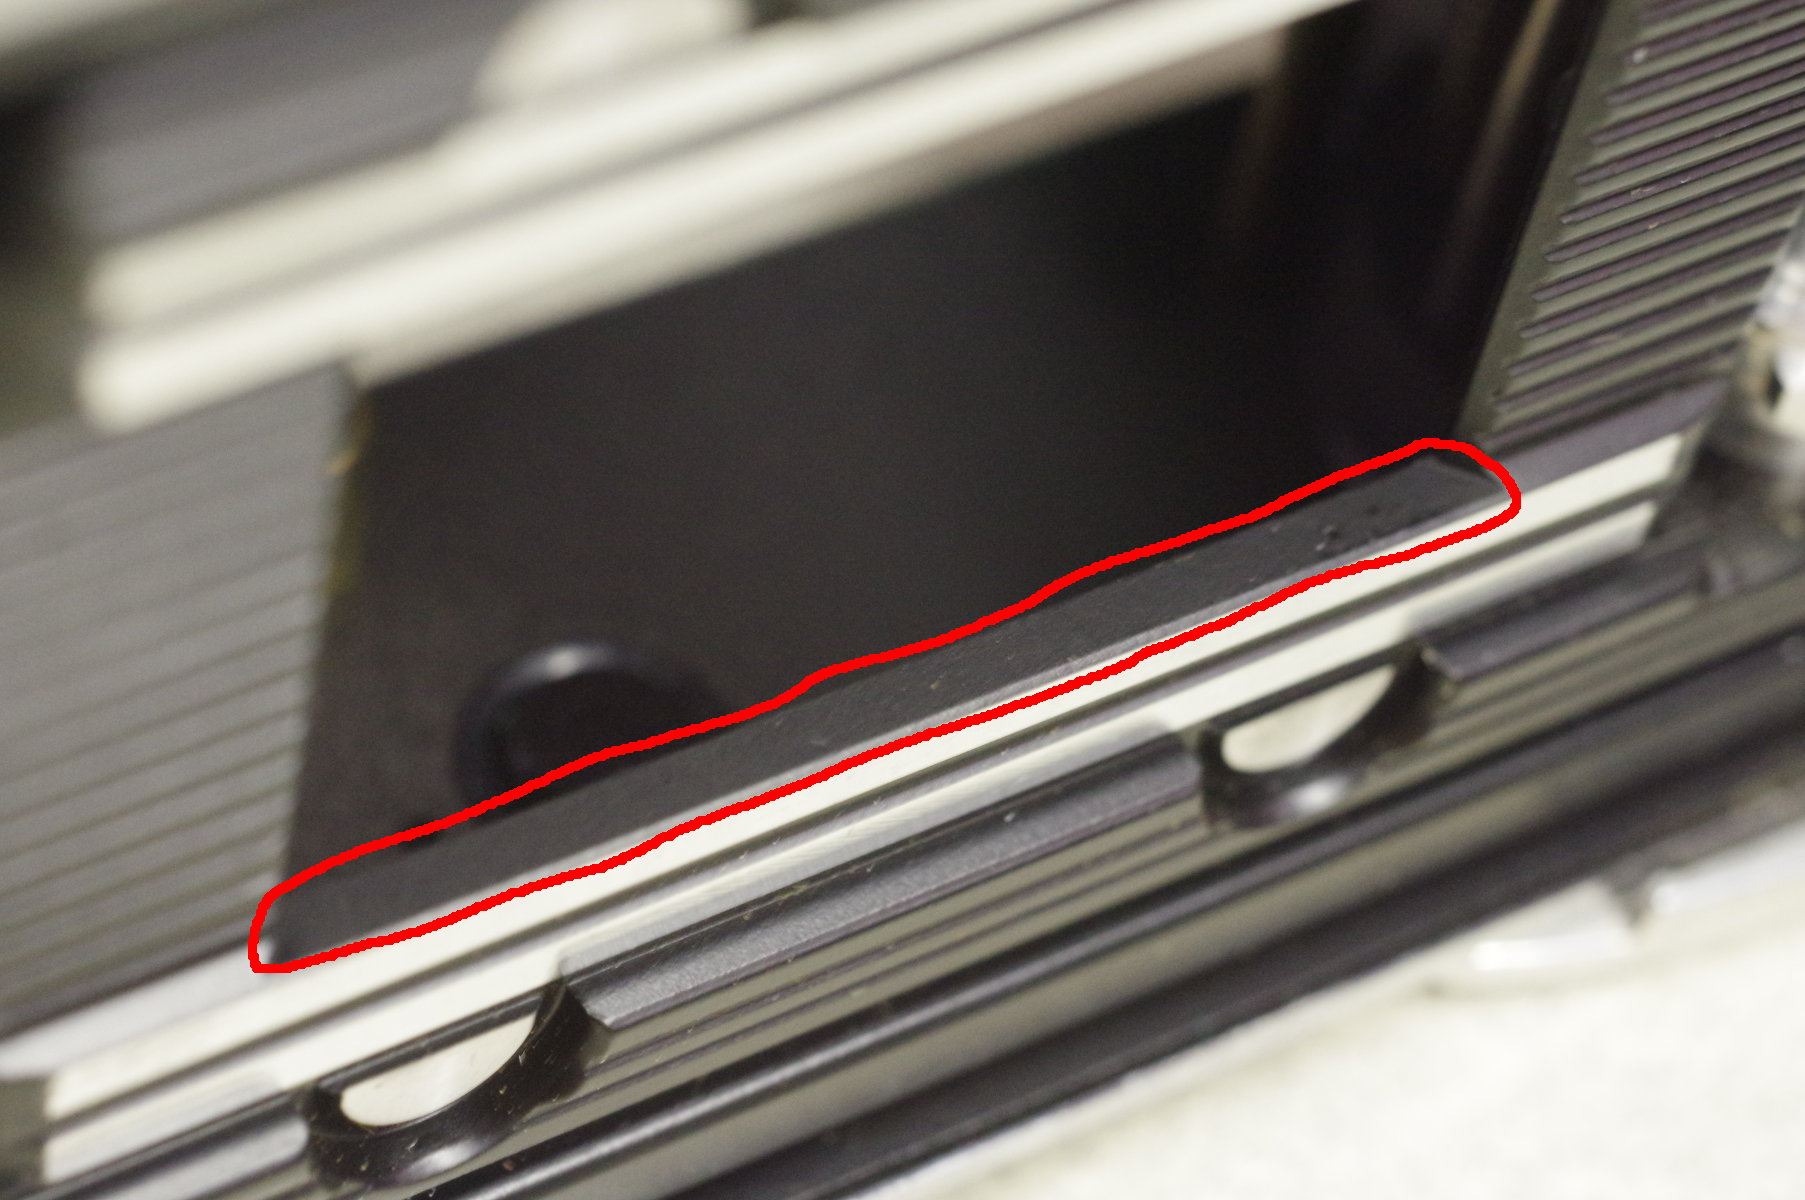 |
Most 35mm cameras have a sill along the top and bottom
of the 24-by-36 mm film window (AKA “film aperture” or “film gate”) at the back of the camera.
This photo shows the lower sill. Light leaving the lens reflects
off this sill and onto the film, creating flare. This is a common problem with dark objects
against a bright background such as a sidewalk (in this case) or the sky.
Sill-flare often ruins the top and/or bottom few millimeters of your pictures,
in effect, making your negative smaller. Surprisingly, flat-black paint becomes reflective
at low angles, so the paint on the sill helps little. You can verify this
by holding the shutter open on B, with the lens wide open, and pointing the
camera at a light. Aim the camera so the light will land on the sill, and you
will see a bright reflection off of it when you look at the sill at a low angle
(as the film does).
A possible solution to sill-flare is to mix a powder into flat black paint,
and paint the sills with this mixture.
The powder forms microscopic mountains in the paint that cast shadows at low
light-angles, eliminating low-angle reflections. Years ago, I tried mixing spices into paint,
and had success with one spice, but I can’t remember which. Ground cloves is
promising because its fineness seems right. Avoid a spice which is ground extremely fine.
Don’t use sand, as it will quickly sink to the bottom of the paint can.
|
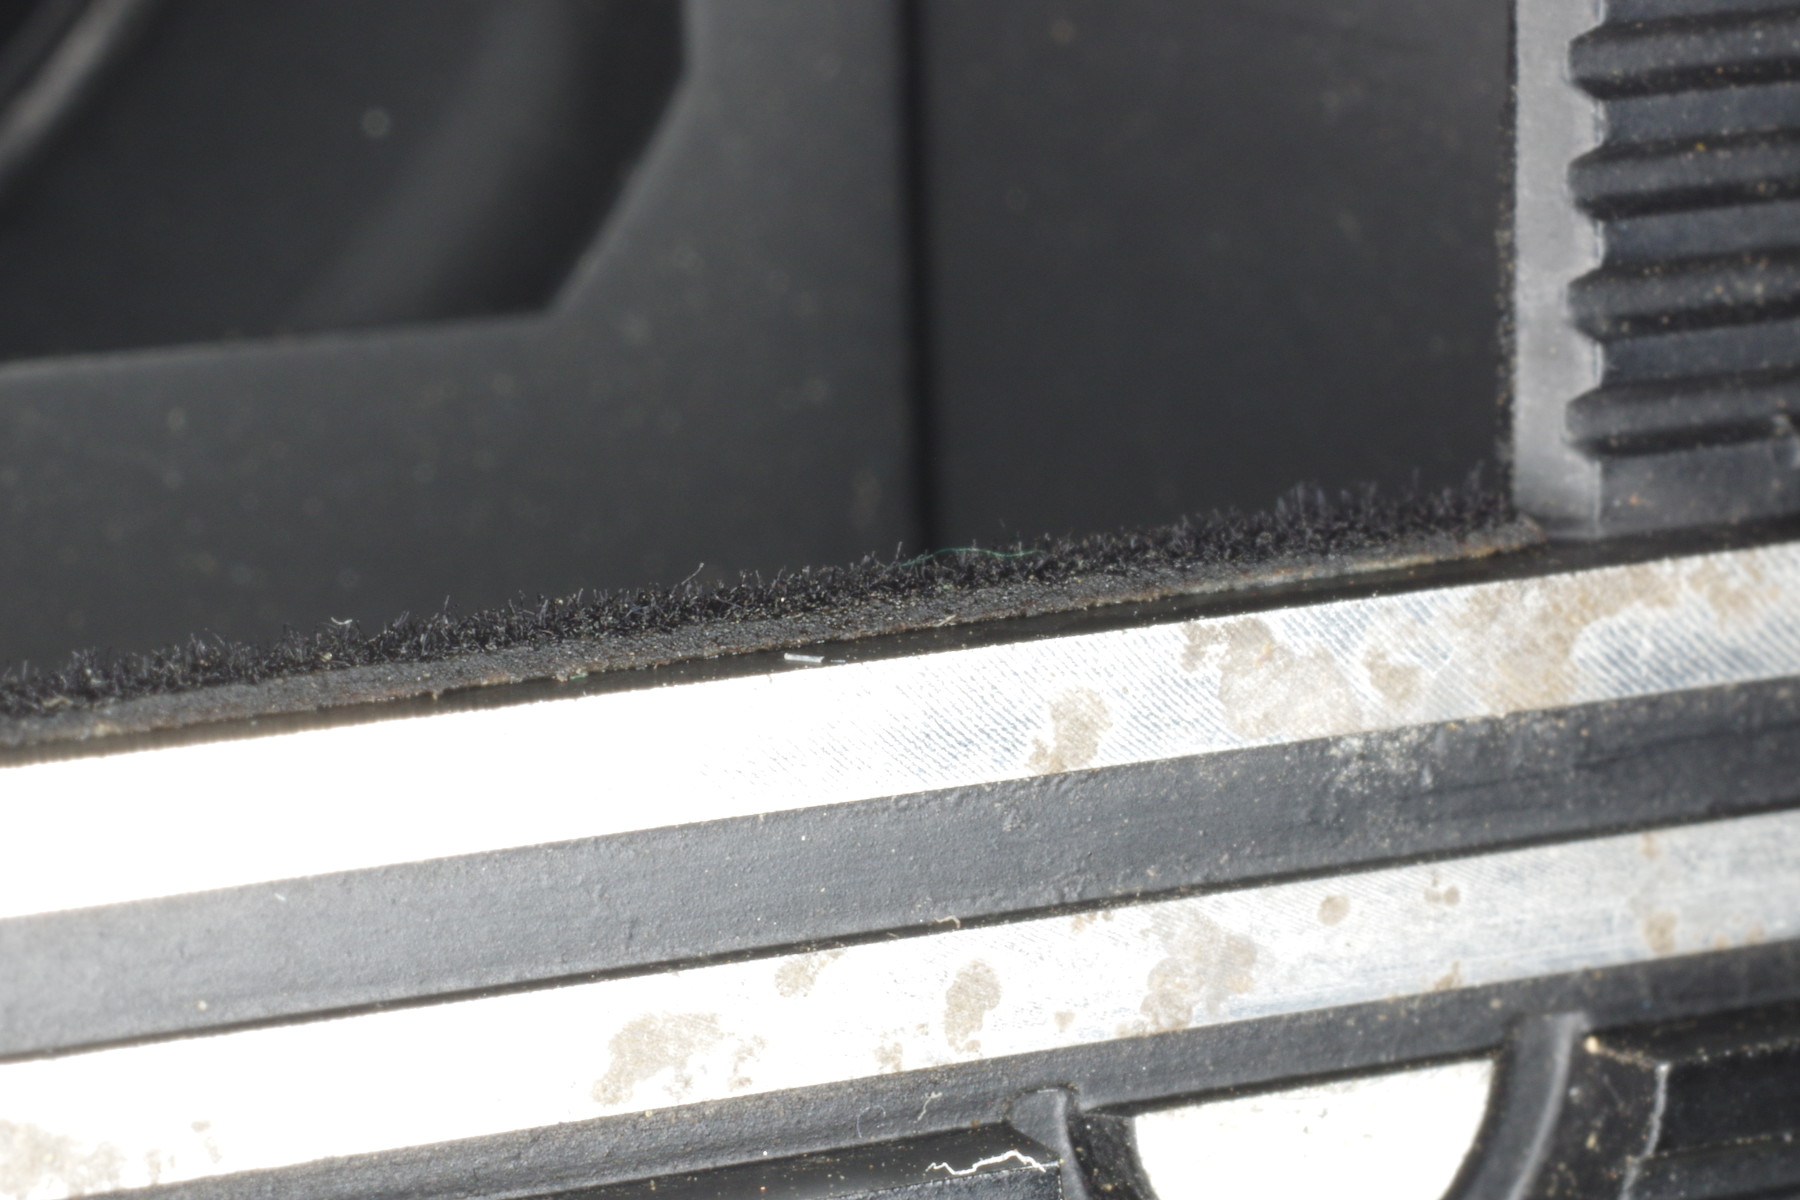 |
Another solution is to cover the sills with sticky-backed flocking-paper.
Owners of telescopes cover the interiors of telescope tubes with this
material to eliminate flare. Here’s one vendor selling flocking that’s only 0.015 inches thick:
http://www.scopestuff.com/ss_flok.htm
Here’s another vendor whose flocking is 0.025-0.030 inches thick:
http://www.protostar.biz/hitack.htm
You see the scopestuff flocking in this photo.
Notice that I left a strip of sill (nearest the film) uncovered. I did this so that the flocking would
not reduce the height of the image area by casting a shadow on the negative. For this reason,
I also put a gentle slope in the felt by melting its edge with the tip of a soldering iron held at a low angle.
If you choose not to melt the felt edge, I suggest leaving a little over 1 mm of sill uncovered.
If you melt the edge, you can leave a little under 1 mm uncovered.
|
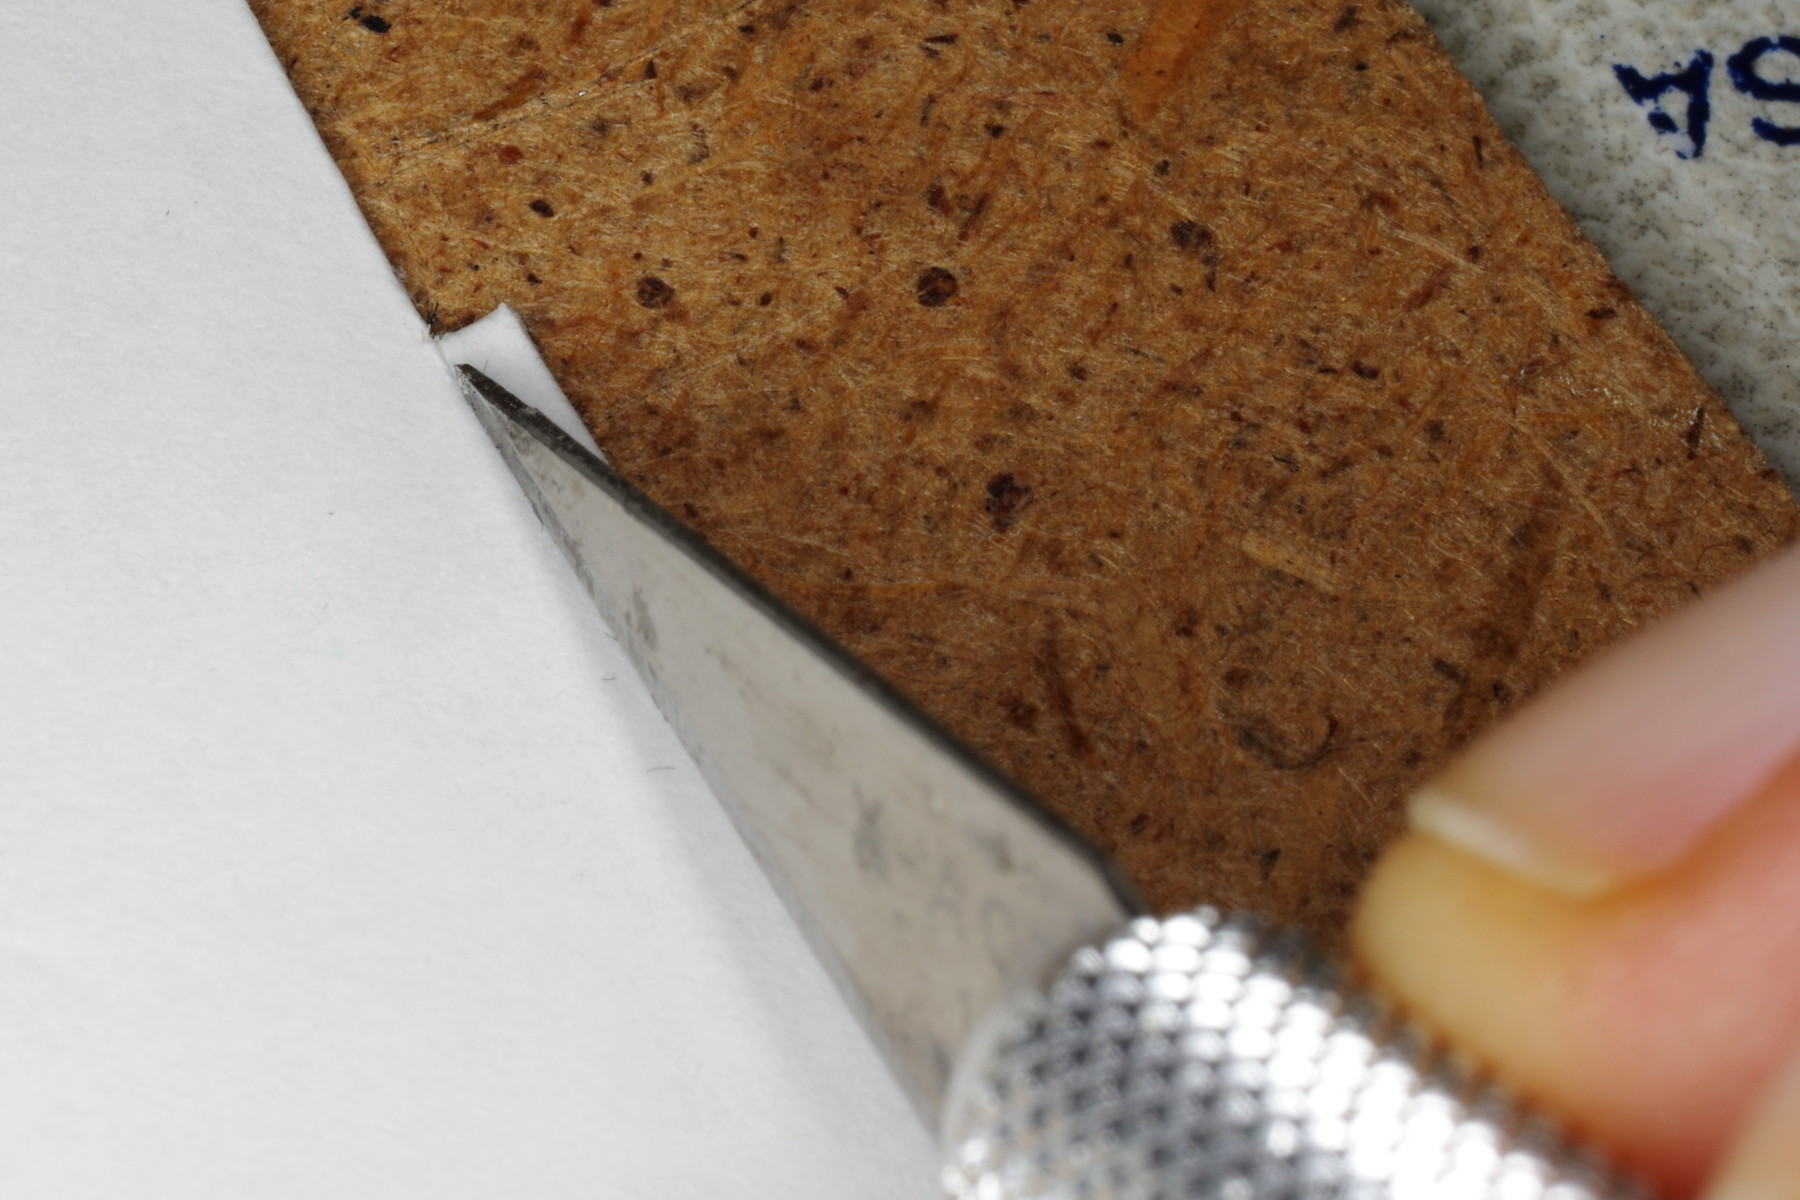 |
I suggest cutting the flocking upside-down on the cutting board,
but unlike this example photo, guide your cut using a metal straightedge.
How well does this work?
By looking at the sill with a light shining through the lens, flocking looks effective.
And two test-shots looked fine.
But I have not yet shot a roll using flocking.
|
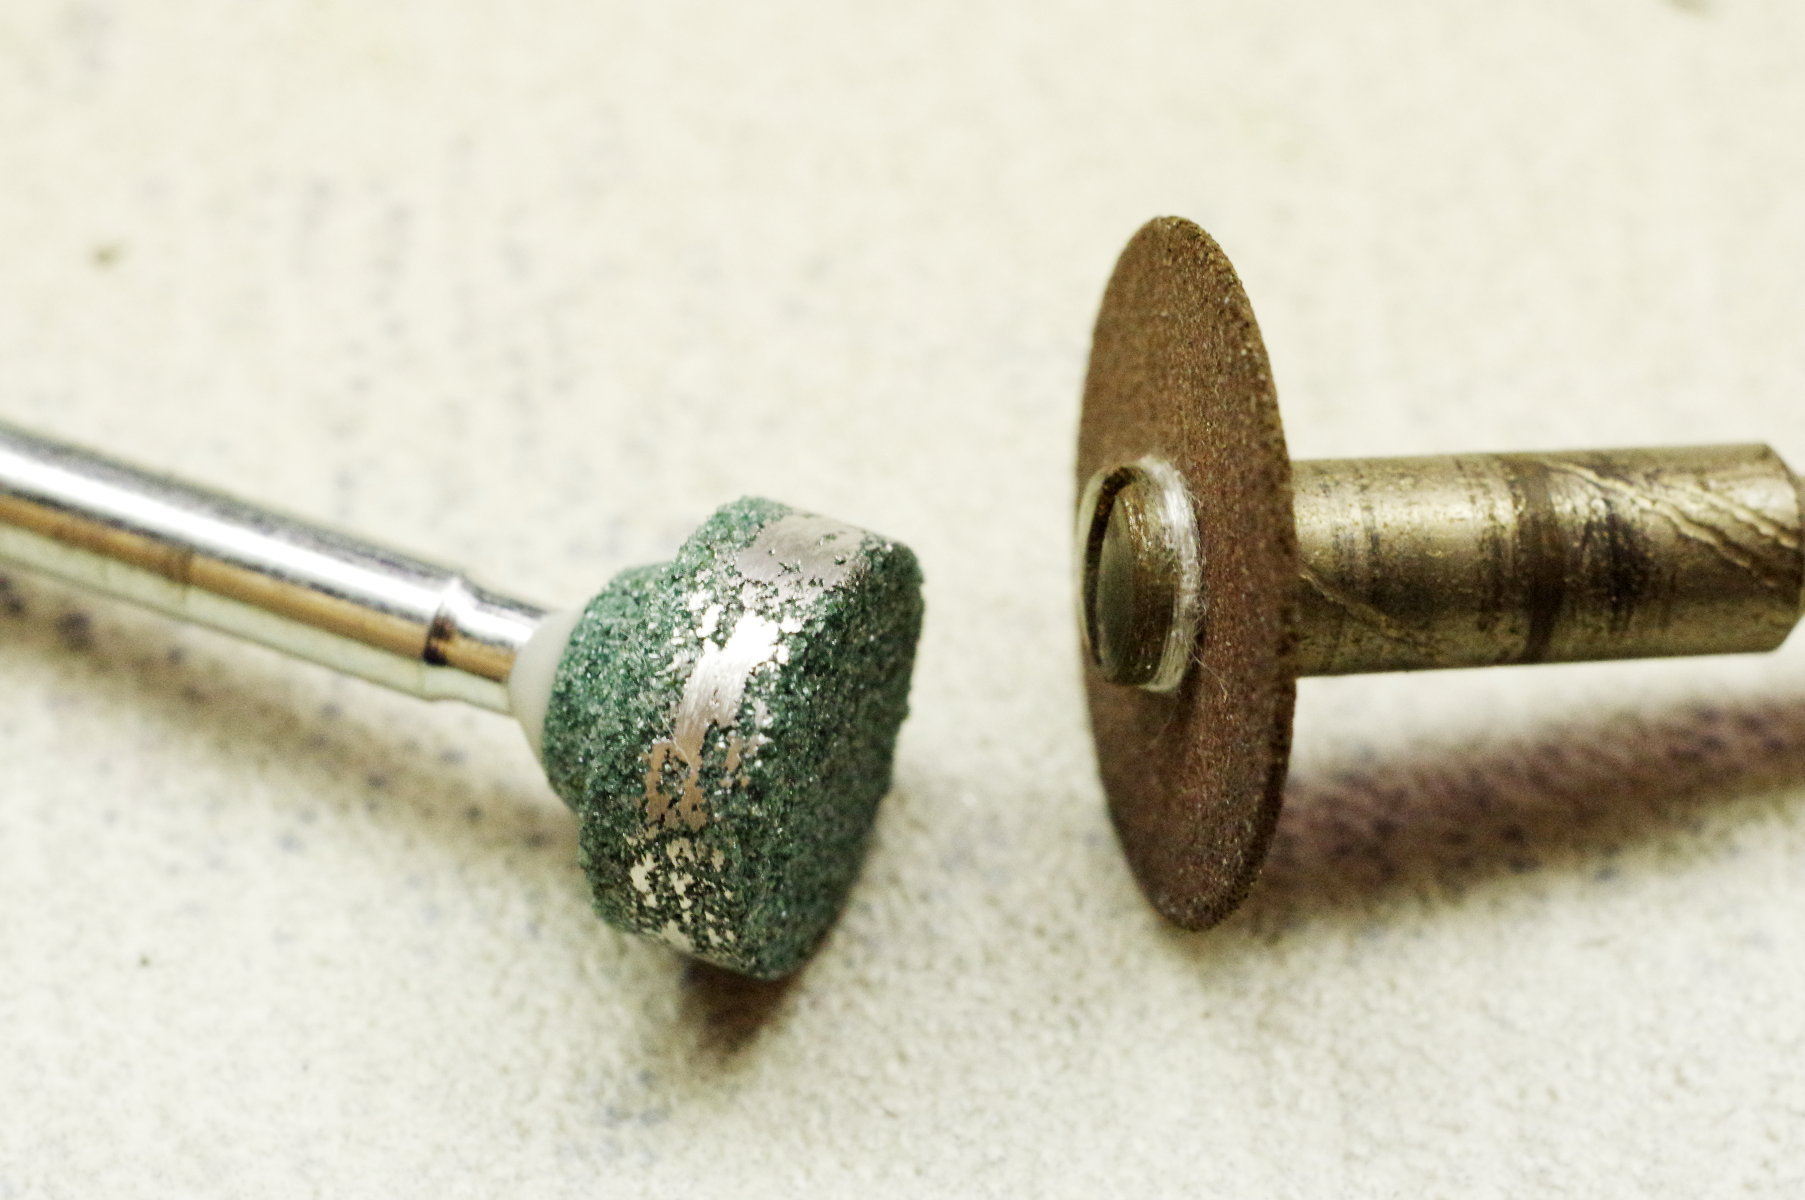 |
A third way to eliminate sill-flare
is to grind the sills down to at least 45 degrees using a Dremel.
In fact, it’s best to grind steeper than 45 degrees so that a minimum of dispersed flare will strike the film.
I tried grinding a sill with the grinding stone on the left,
but it filled with aluminum as shown, becoming useless.
The “Dremel 409 cut-off wheel” shown on the right worked well.
|
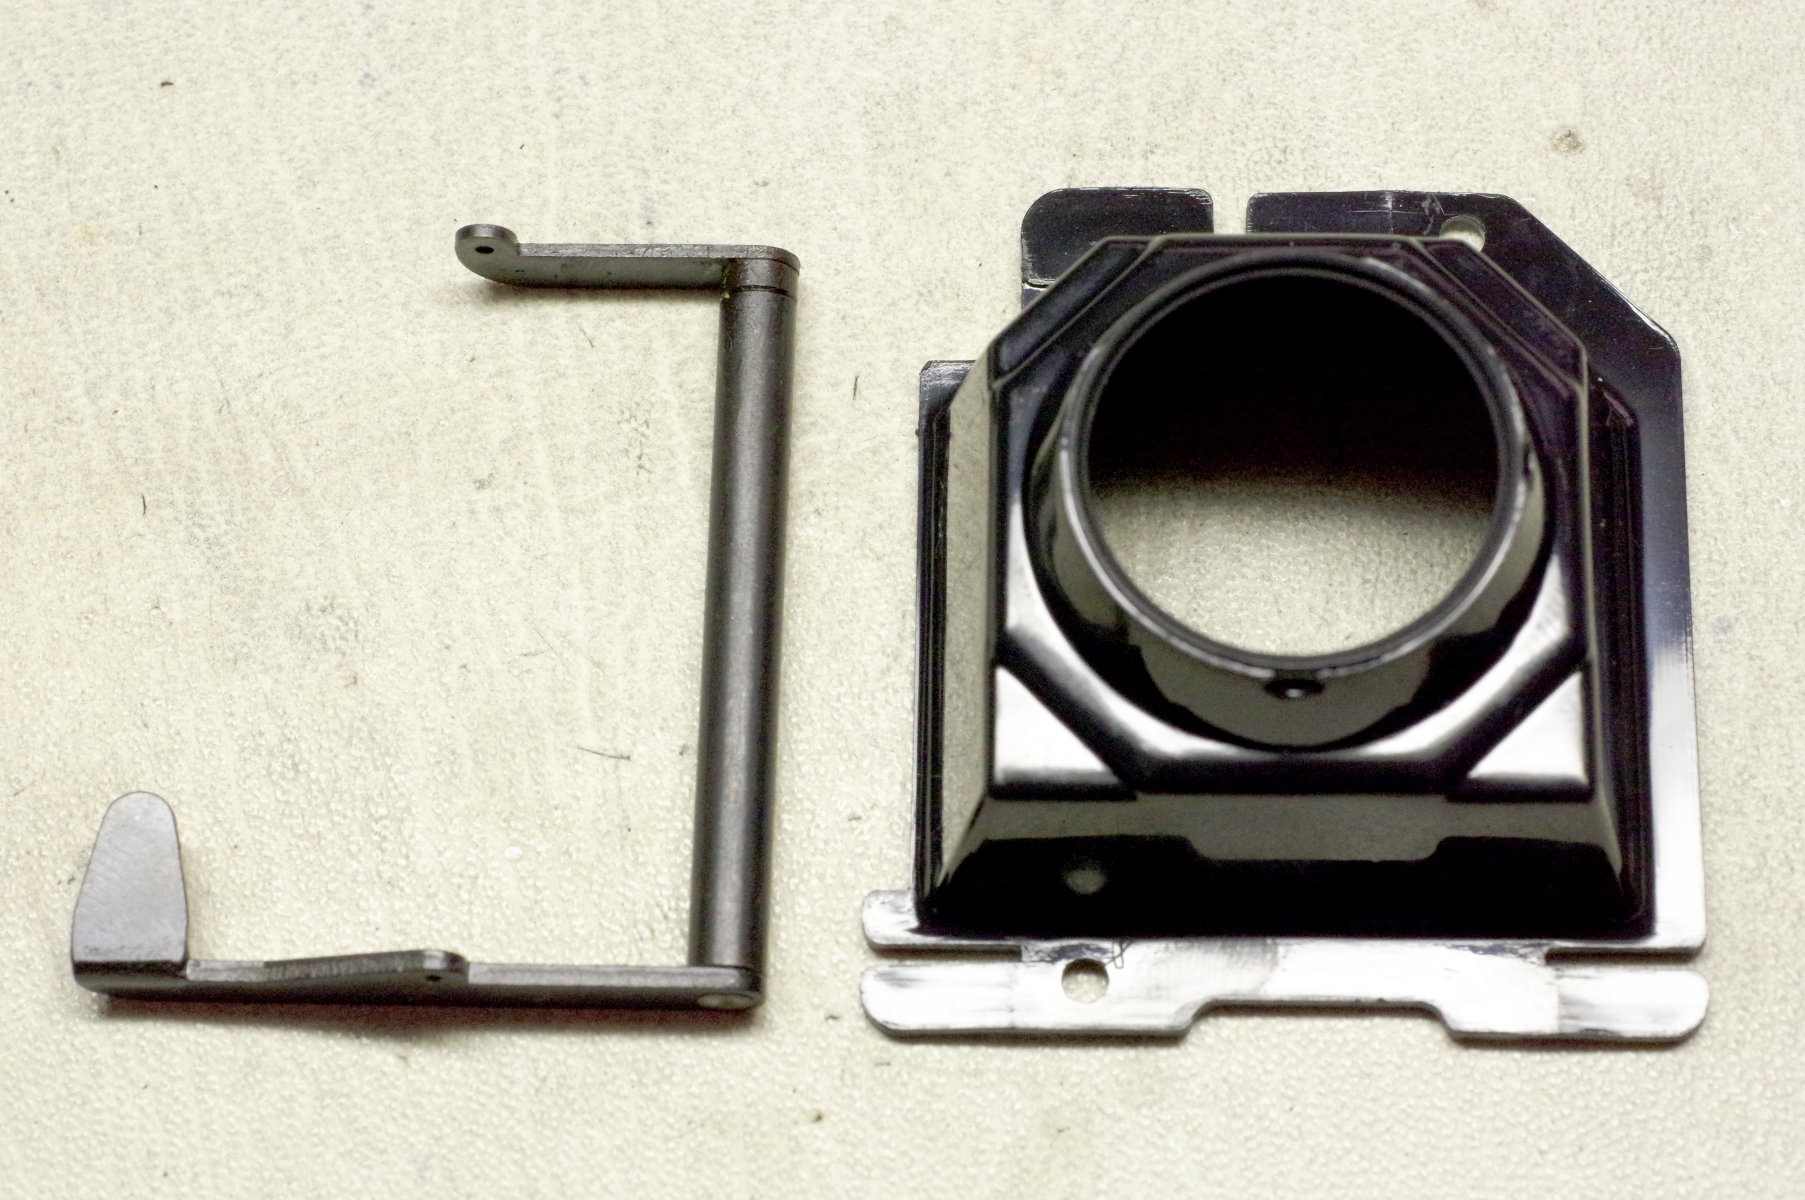 |
Most cameras have a baffle on the front, which you should remove if possible.
This camera is a Retina automatic III, and
by bending the rangefinder linkage (on the left), you can remove it from the body
without unscrewing its bottom support (which would require removing the bottom
of the body). Likewise, you can bend the plastic baffle to get it past the
RF support-pin, and remove it.
|
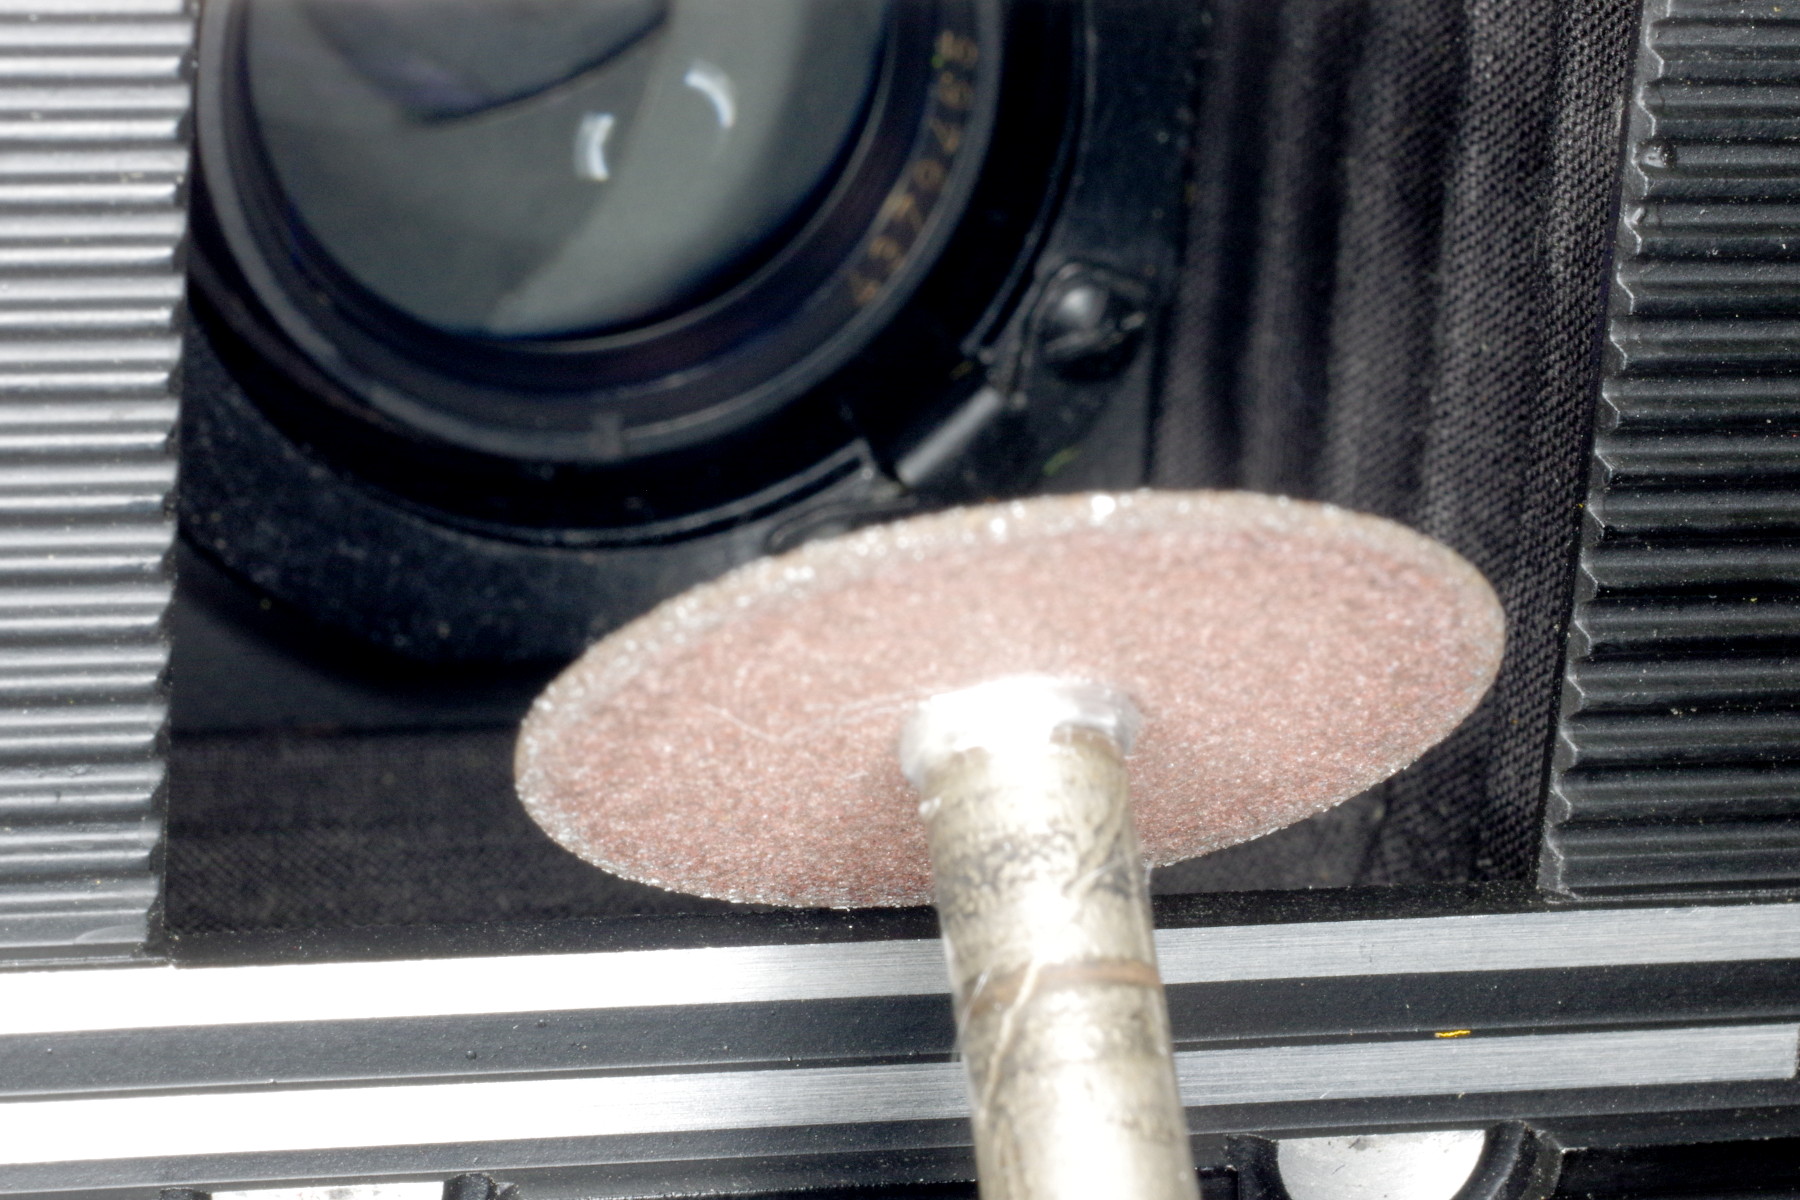 |
Note that the baffle is glued to the body in many cameras.
On these, you cannot remove the baffle, making grinding sills difficult when
holding the cutting wheel perpindicular to the sill. However, this photo shows a way
to grind sills that keeps the cutting wheel out of the baffle chamber.
This is how I recommend grinding sills on folding cameras, such as this
Retina IIIc. You will need to rotate the Dremel to the left or right
in order to grind near the corners of the film window.
Important: I suggest that you stuff the baffle chamber with foam rubber
to keep aluminum dust out.
|
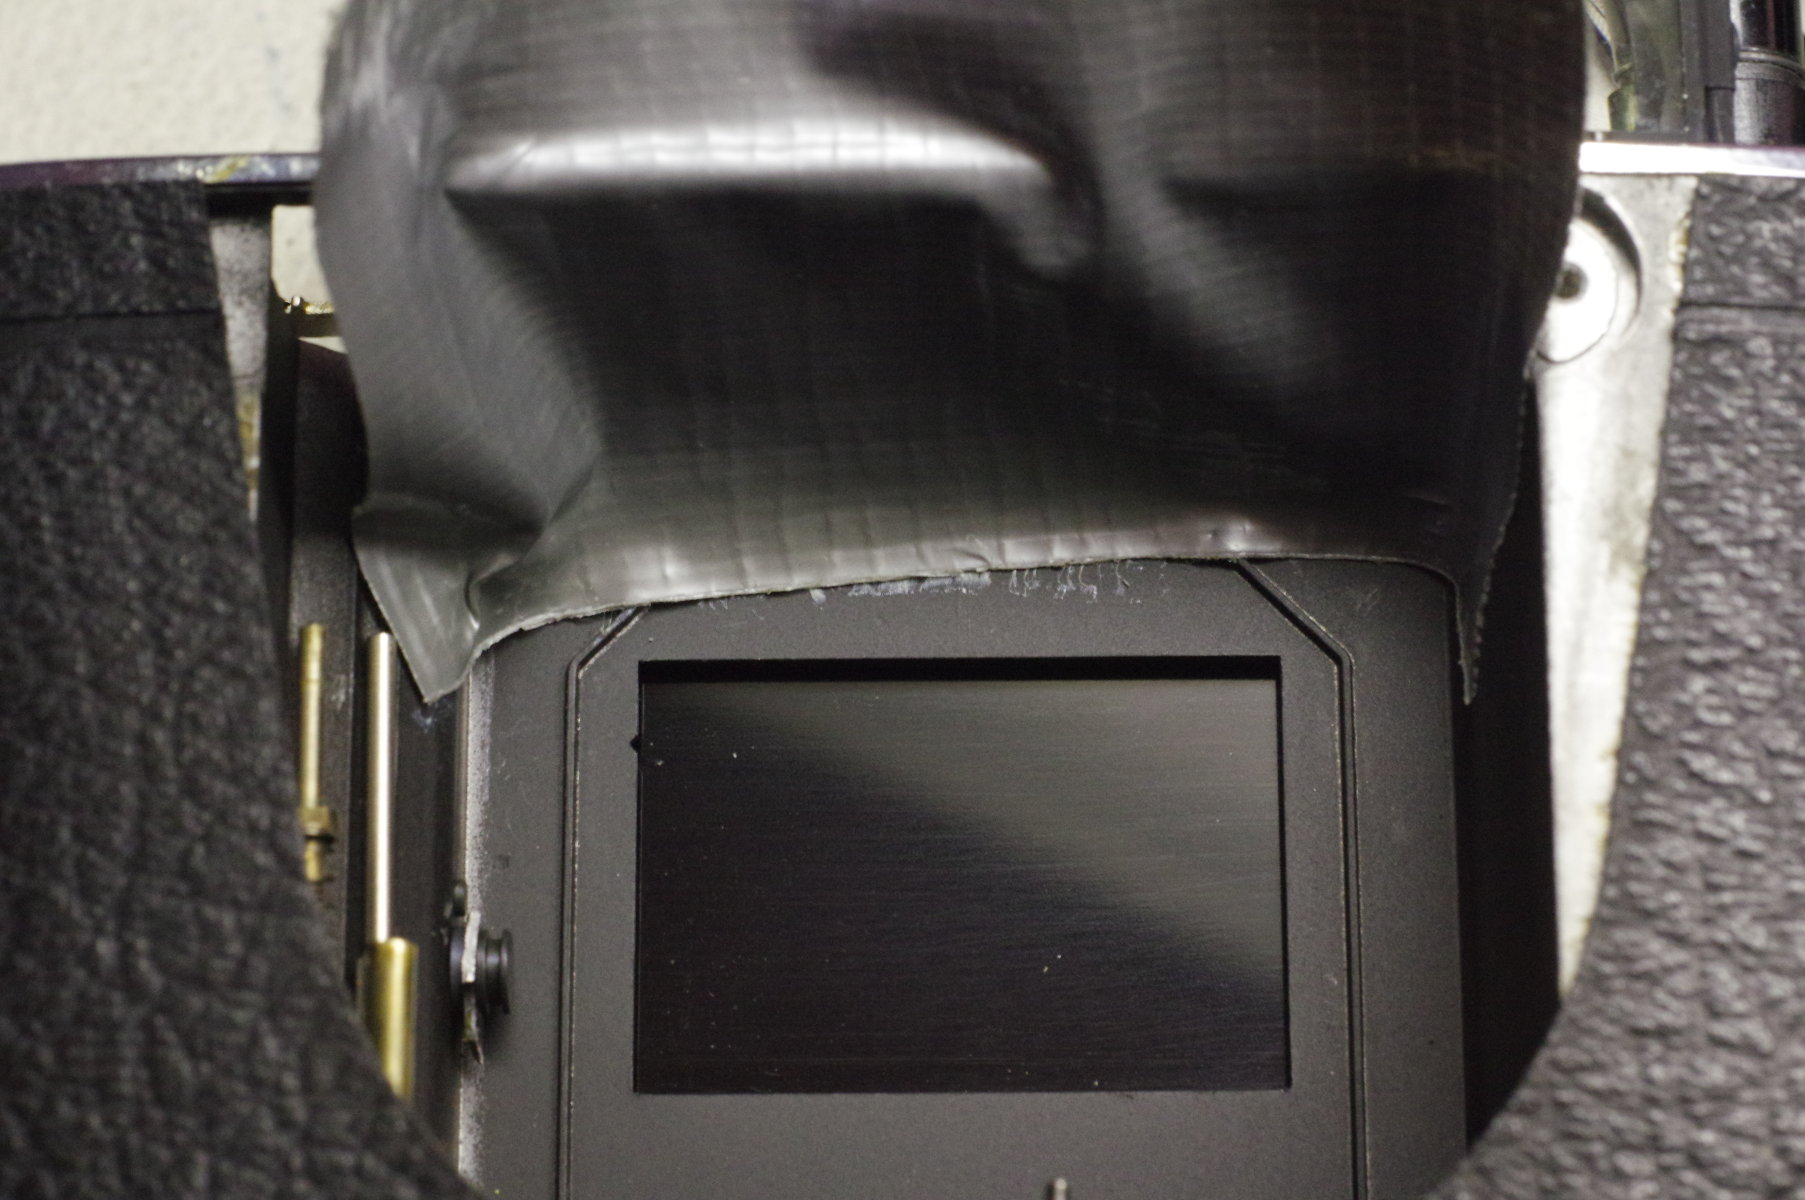 |
I was able to remove the baffle on this camera,
and I used tape to keep aluminum dust and filings from getting into the machinery on top.
After masking the machinery on your camera, grind away!
|
 |
I cleaned up the newly-sloped sills by filing them
with a small flat jewelers file (also known as a “needle file”),
but if space permits, a normal file allows you to work faster.
You can see some spots on top where I let the cutting wheel dig in too deeply.
These mistakes are harmless because they will merely put some image on the sprocket-holes.
When done, aluminum dust will be everywhere. I removed it by first brushing all surfaces
with a toothbrush while holding the camera such that the camera would be above the falling dust.
This means the bristles are facing up, and the area being cleaned is facing down.
Then I blasted everything with compressed air, and went over it again with the toothbrush.
Note that on some cameras, you can grind slopes on a completely assembled camera.
You’ll need to be careful to not accidentally grind the baffle, and using a jeweler’s file to
smooth the slopes will require care due to lack of space, but I’ve done it.
Use compressed air and then a toothbrush to remove all the aluminum dust inside the baffle-chamber.
When done grinding, filing, and cleaning, you should paint the slopes flat black.
When light strikes these angled black sills, what little light reflects will
travel away from the film, eliminating flare.
Let’s see whether this modification works.
|
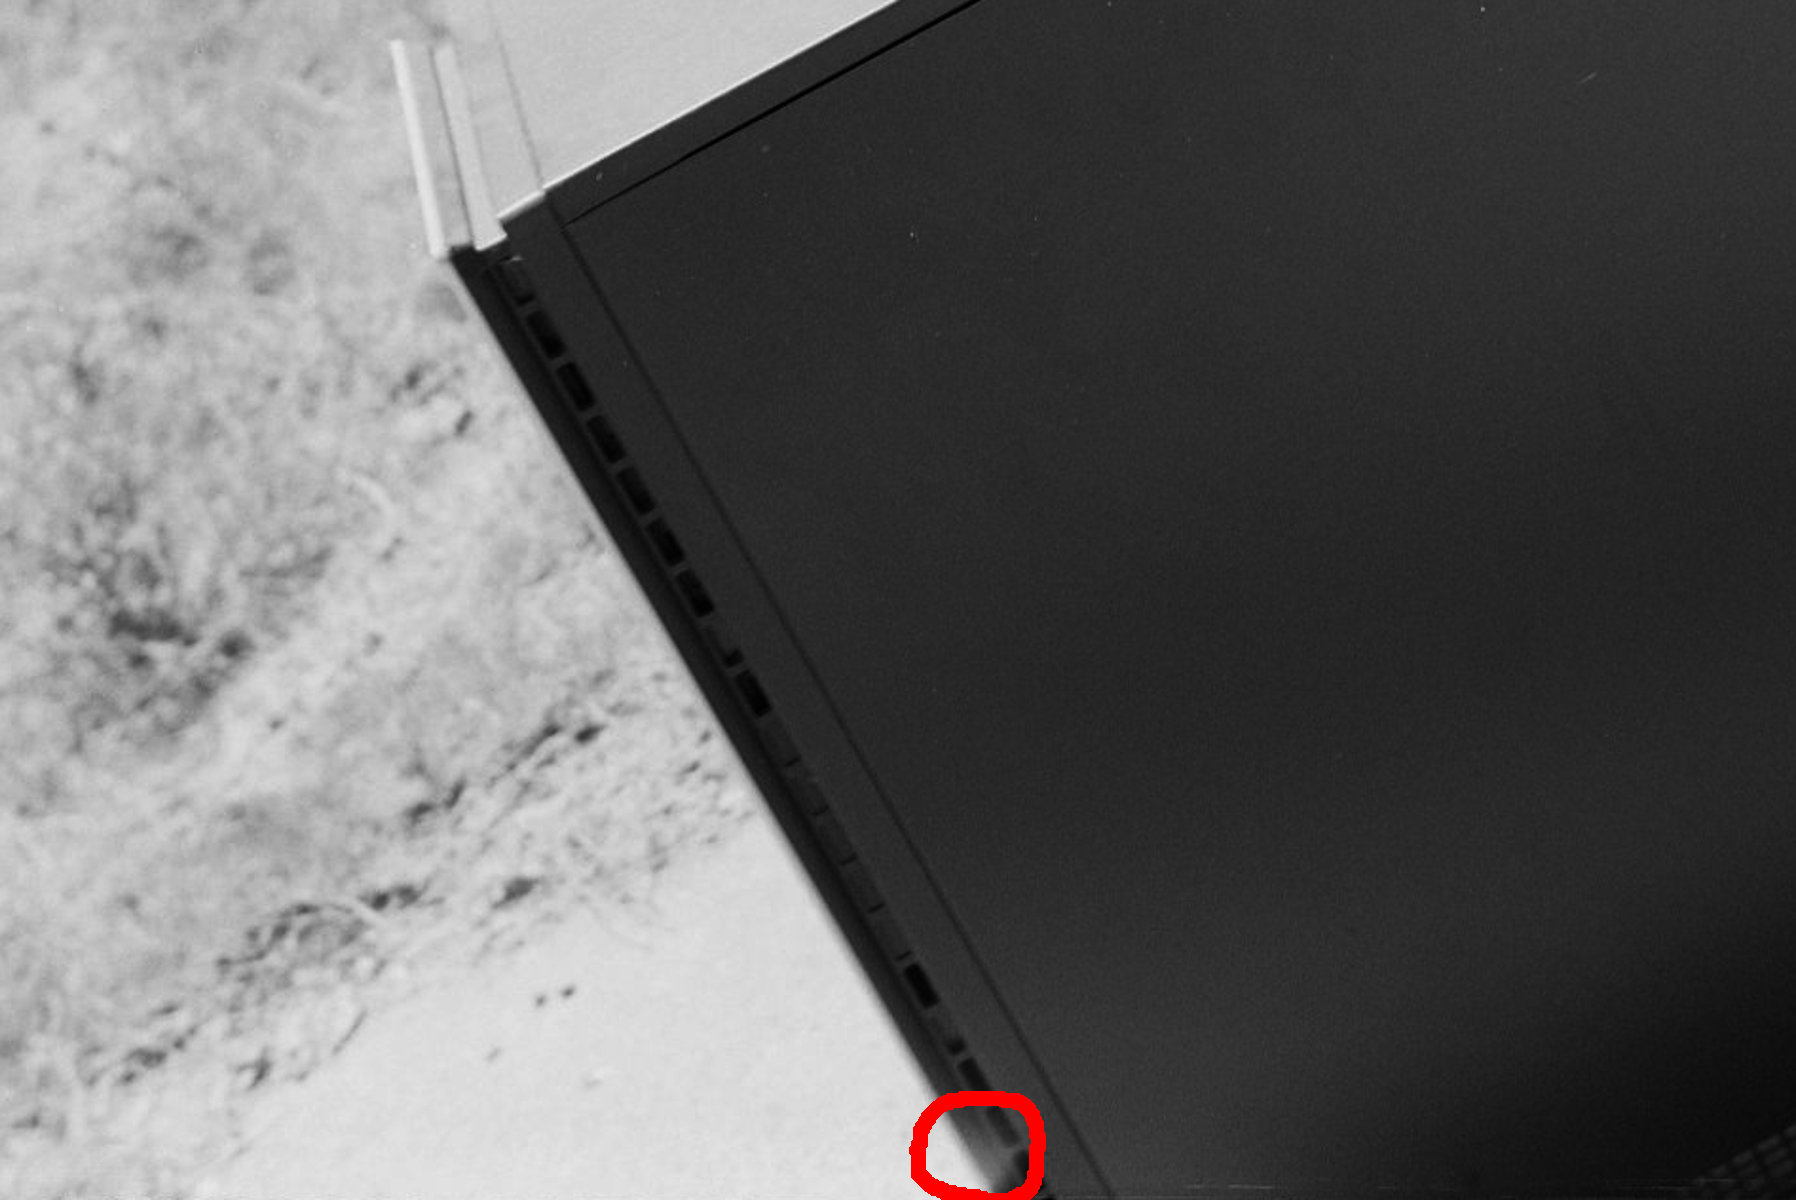 |
I was able to reproduce the problem by photographing this old computer case on
the patio. This is a quarter of the negative (half its width and height).
Such flare can ruin your negatives when it’s in your subject-matter.
|
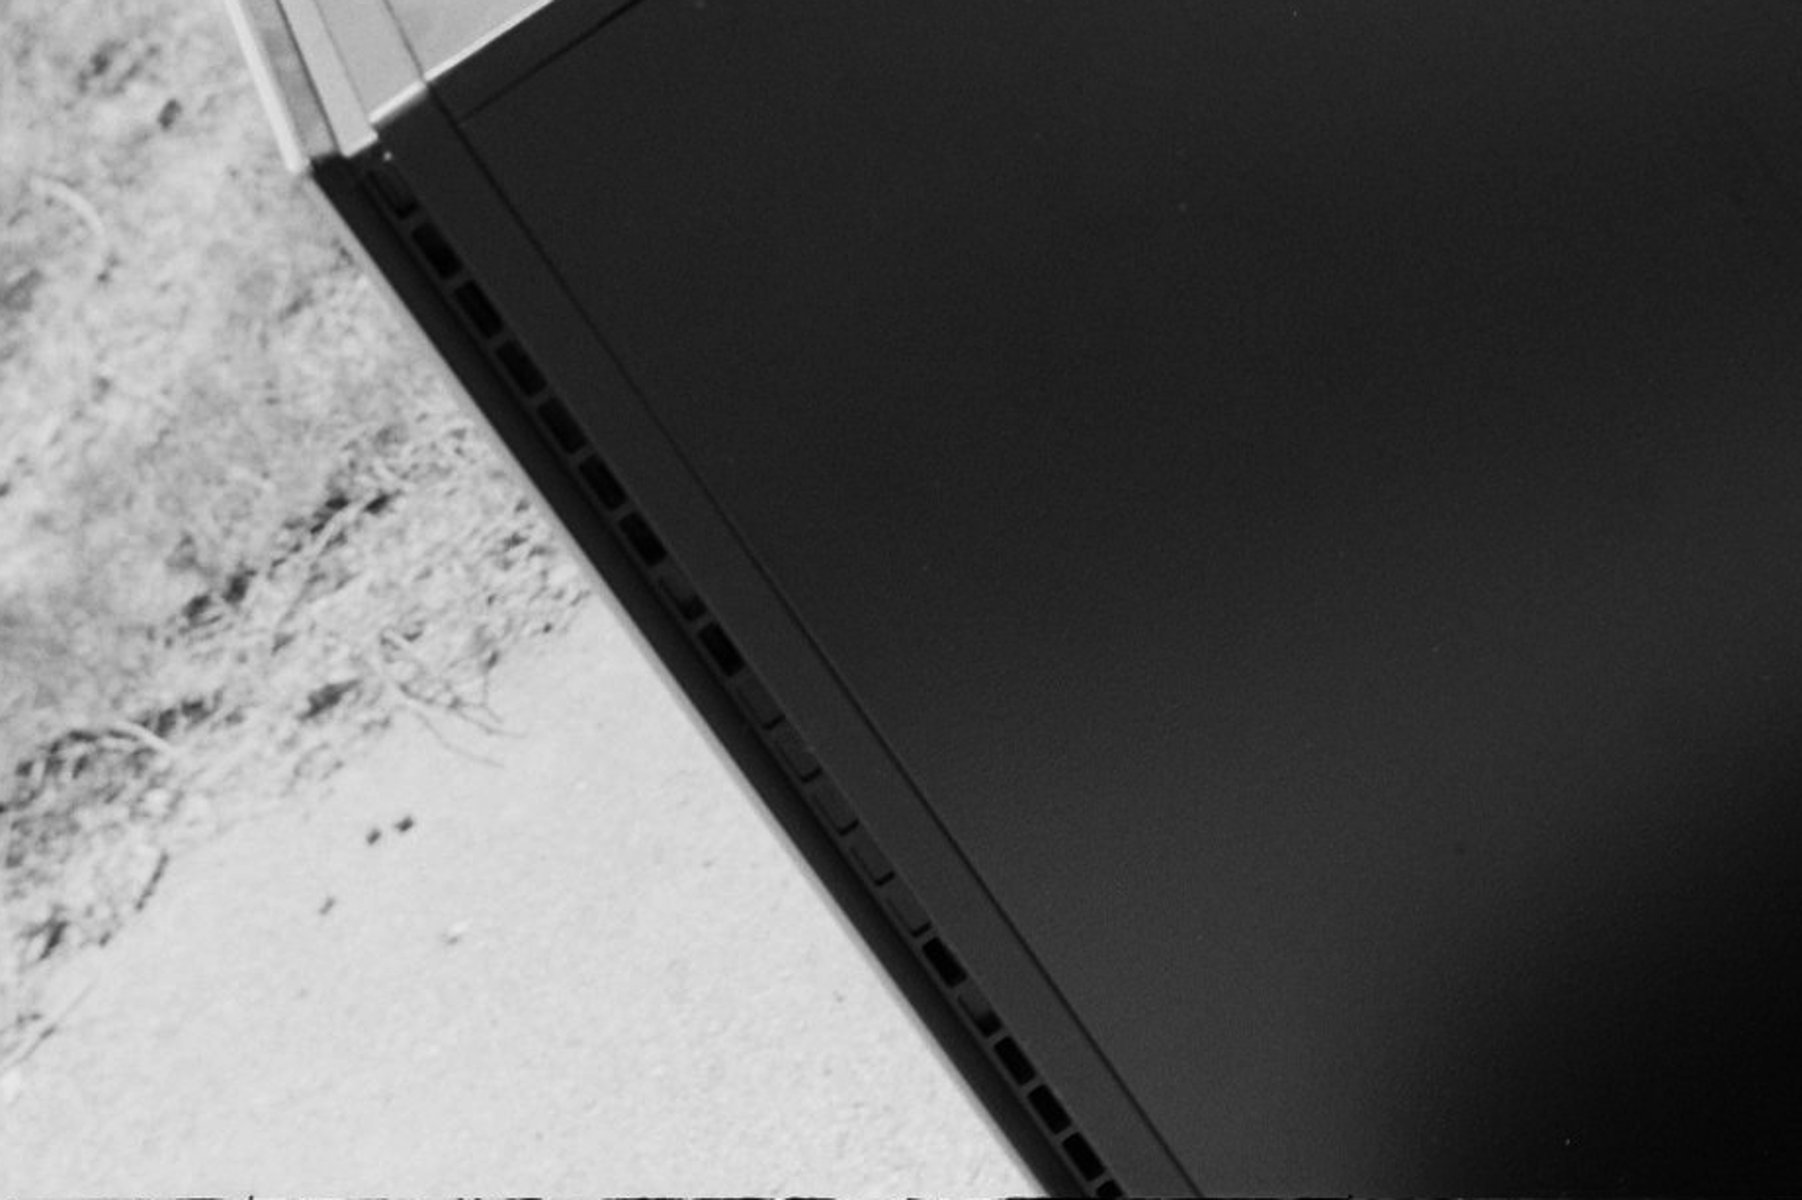 |
Problem solved!
|