The shutter assembly comes apart in layers, with the shutter blades being
the bottom layer. The instructions below guide you in removing these layers,
and on cleaning the blades themselves.
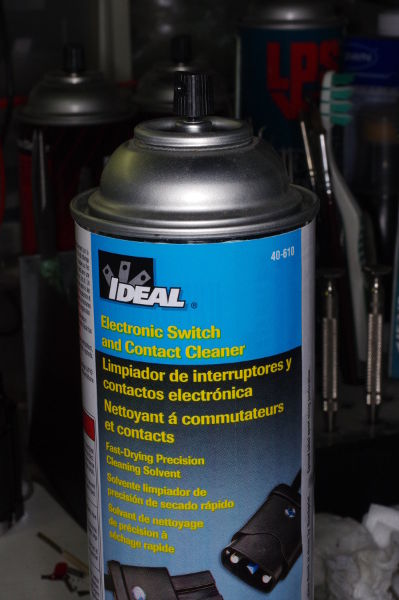 |
You should clean the blades with a proper solvent. A good choice is electronics cleaner,
such as “CRC Electronics Cleaner”, or the brand shown in the photo, purchased at
an auto-parts store. VM&P naphtha also works well, and is what I use for
cleaning most machinery in cameras. You can use lighter fluid, such as Ronsonol, available at liquor stores.
It works well, but takes longer to dry, which can be a nuisance for the aperture blades
which cannot be separated from their hinge in this camera
and therefore will remain wet for a long time at the hinge.
The first steps below are the same as those described in my
article on modifying these cameras to have manual control over their two shutter-speeds.
If you came here from that article, you’ve probably already done these initial steps.
|
 |
We will now prepare to remove the front element of the lens. Set the focus to infinity.
|
 |
Use a jeweller’s screwdriver to loosen the three set-screws on the inner focus-ring by two turns.
Two turns is enough; you don’t need to remove these screws.
|
 |
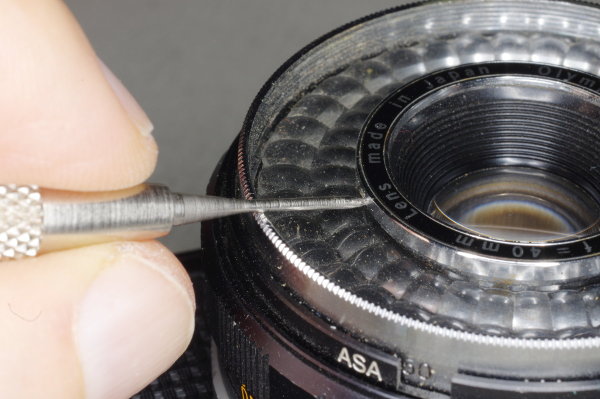
Here’s a tricky step: You need to remove that focus-ring without rotating the lens.
And the lens rotates effortlessly, so you must be careful.
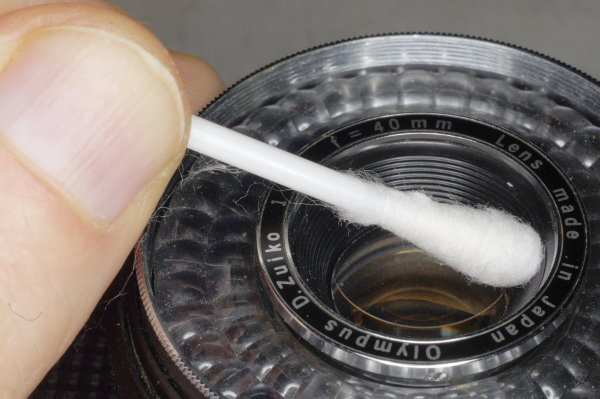
One way to prevent rotation is to block the lens by pressing firmly on it
sideways with a cotton swab as shown,
and lift the ring, with the swab passing through the ring.
|
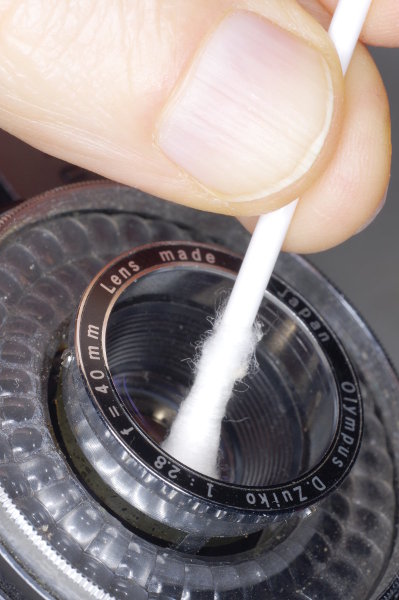 |
I am blocking the lens here with the swab, and the inner focus-ring is partly out.
|
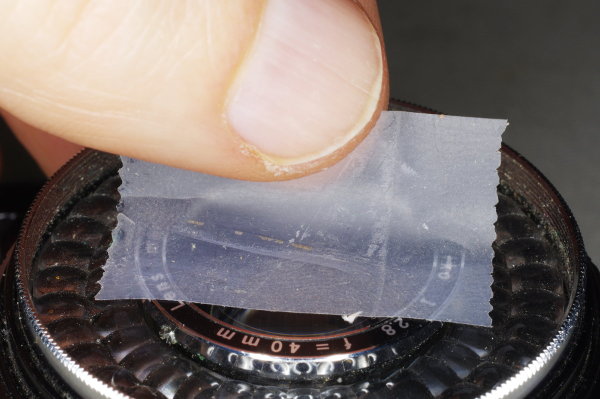 |
An alternative is to carefully lift the ring with a piece of cellphane tape.
|
 |
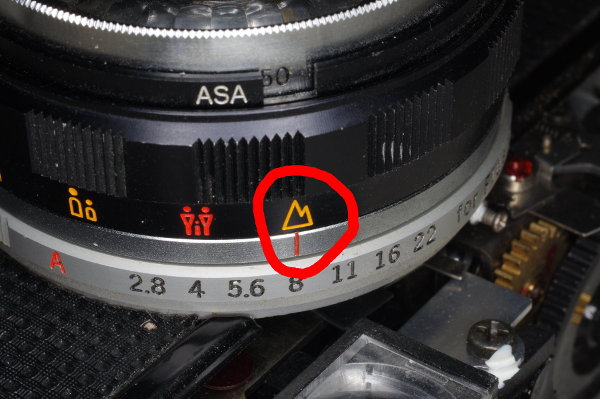
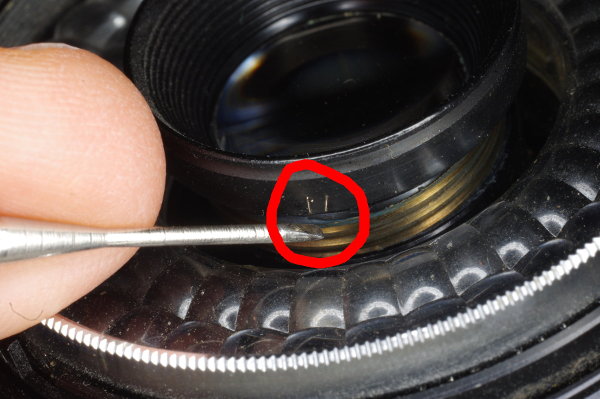
Mark the position of the lens by making a scratch as shown with the tip of a screwdriver
aligned with a screw underneath.
There might already be a scratch on this part from the factory.
If so, check to see what it’s aligned with.
|
 |
From this viewpoint, we can see the screwhead that my scratch is aligned with.
|
 |
Rotate the lens until it just comes free. Then put two scratches on it by the same
screwhead. The threads for the lens can enter at two positions; i.e., these threads
have two starts or entries. On reassembly, you need to begin threading at the
correct starting position.
|
 |
Remove the three screws securing the front ring-assembly.
Note that these screws are lower than the other two screws in this photo.
Pull off this ring-assembly, taking care to hold the aperture-ring down so it won’t
lift off as well.
You might be constrained by the two wires leading to the selenium cell.
If so, remove the bottom-cover of the camera (two screws), and move these two wires so
you can pull more length out the front of the camera.
|
 |
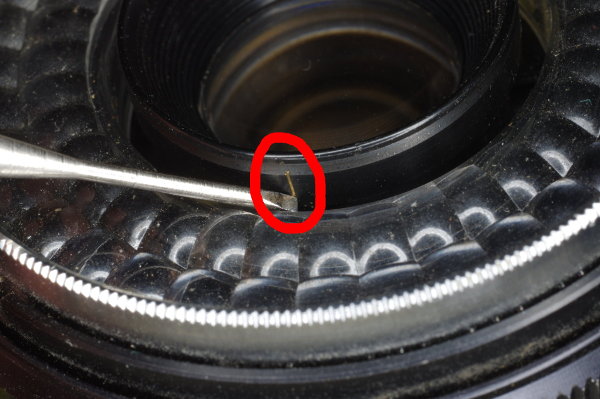
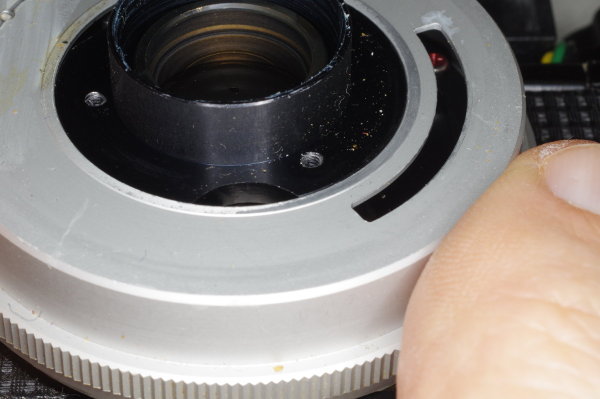
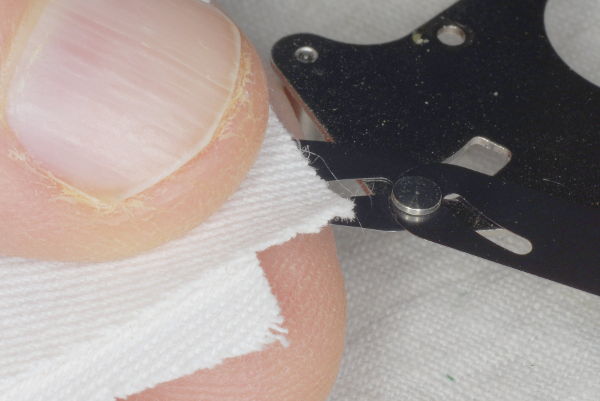
A tiny ball will be in the back of this assembly as shown, or it might be on the aperture-ring
on the camera. Remove this ball. Actually, I prefer to leave it on the ring-assembly as shown,
but secured with a small dab of grease.
|
 |
The aperture-ring can be lifted off.
|
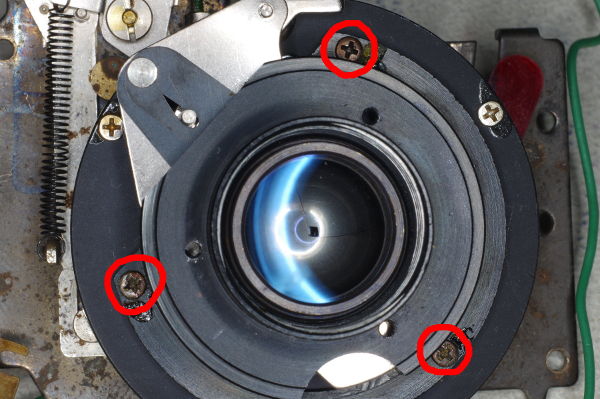 |
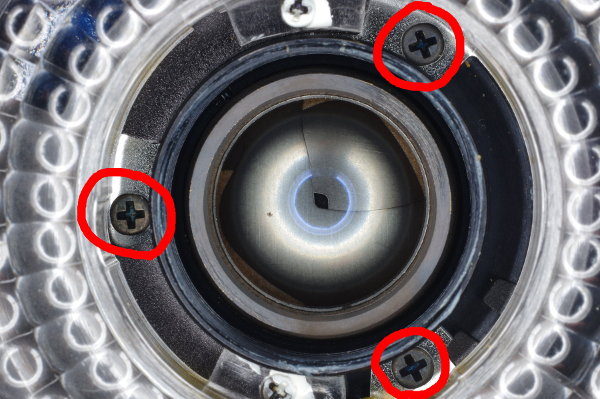
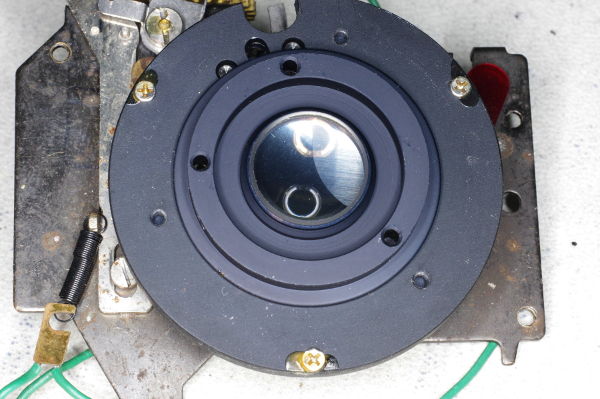
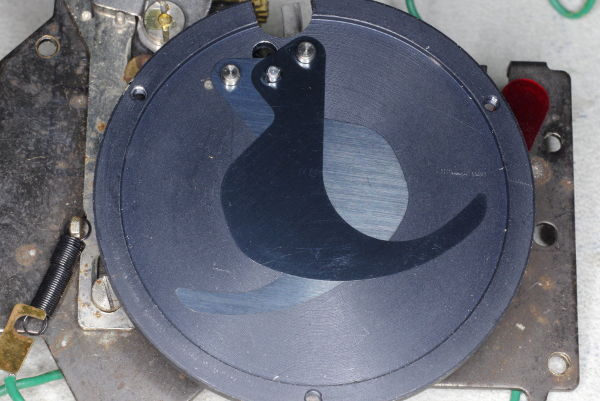
This is what you’ll see after removing the aperture-ring.
However, this shutter has been removed from the camera;
if you only need to clean blades, you don’t need to remove it as I did here.
In this photo, you are looking at the center lens-element. Unscrew the three
screws circled in red, and lift off this element.
|
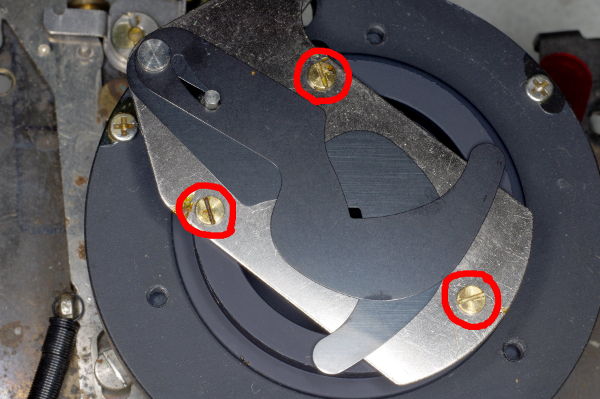 |
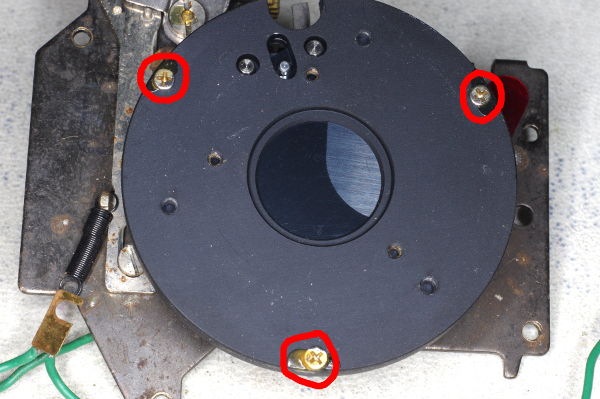
You now have access to the aperture blades.
If you are not accustomed to handling small delicate parts, it might be prudent to
clean the aperture blades with no further disassembly. Dampen a soft cloth with
cleaner, and slide it under the bottom blade, between the two blades, and over
the top blade. Do this three times to remove all traces of oil.
But if you’re comfortable working with small parts, or if you need to clean the
shutter blades, then remove the three screws circled in red, and pull off the
aperture assembly.
|
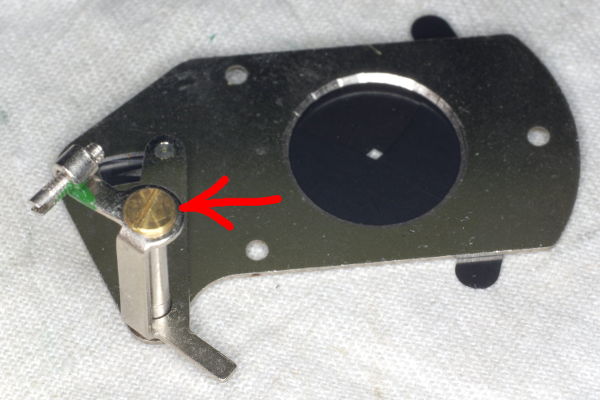 |
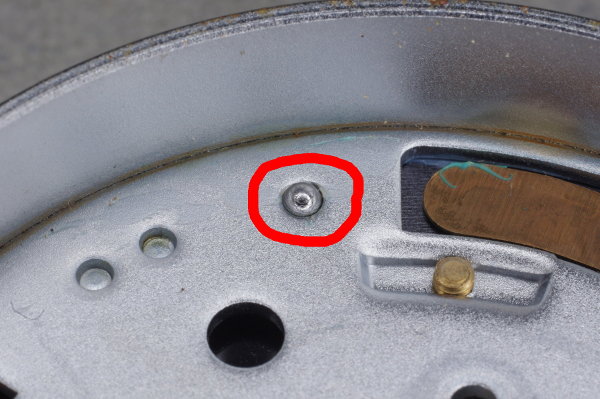
Turn the assembly upside-down as in this photo, and remove the brass screw (red arrow).
There is also a hairspring on the shaft (not pictured); note where it hooks the the mechanism,
and unhook one end before pulling this lever off the shaft.
|
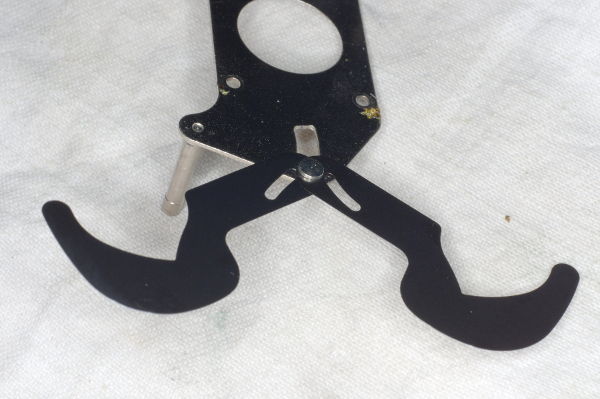 |
The aperture blades cannot be removed because their hinge-pin is riveted on.
But you can spread the blades apart as shown.
|
 |
Dampen a piece of soft cloth with cleaner, sandwitch a blade between two folds of cloth
and a thumb and finger as shown, and pull the blade out of the sandwitch, cleaning it.
You are pulling the blade away from its hinge. Never push a blade toward its hinge,
as you are likely to crinkle it. Two or three of these pull-style cleanings will remove
the oil.
Also, wipe the chrome surface on which these blades slide, and the surface
of the metal part that holds the center lens-element.
Both of these metal surfaces touch the blades, and might have oil on them.
|
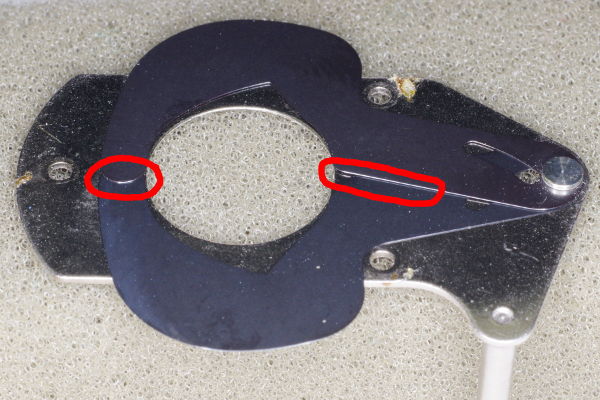 |
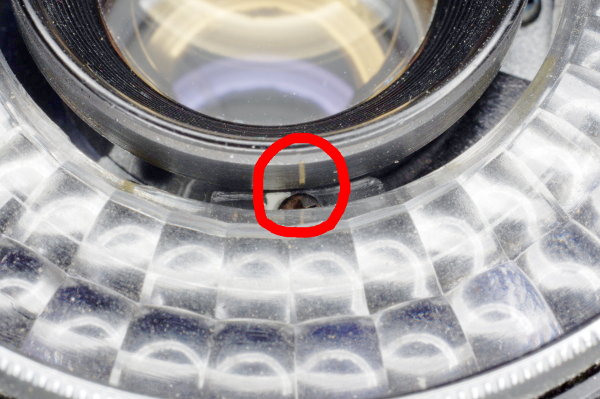
When reassembling the aperture assembly, take care to ensure that the blade that is on
the top of the hinge is also on top at its tail (left red circle).
And be careful that the hairspring is put back correctly.
However, if you plan to make the manual-speed modification, leave the hairspring out.
|
 |
The bottom lens element is sitting on the shutter, unattached. Lift it off.
|
 |
Remove the three screws securing the upper shutter plate.
|
 |
The two shutter blades are not attached, and can be removed with your tweezers and
cleaned. I suggest that you (1) note which blade is on top, and (2) not get the
left and right blades mixed up.
I have found that it’s best to clean blades using the sandwitch technique described
above. Since these blades are unattached, pull a blade out of the sandwitch using
tweezers.
Remember to wipe the upper and lower shutter plates with a damp cloth in case
there’s any oil on them. The shutter blades rub these metal surfaces, and thus
might pick up oil that’s on them.
|